How to Create a DIY Feature Wall in Your Bedroom
This page may include some affiliate links, meaning that at no cost to you, I could earn a commission if you purchase through these links. Learn more. As always, I only link items that I personally use and recommend. Thank you for your support by shopping through my links.
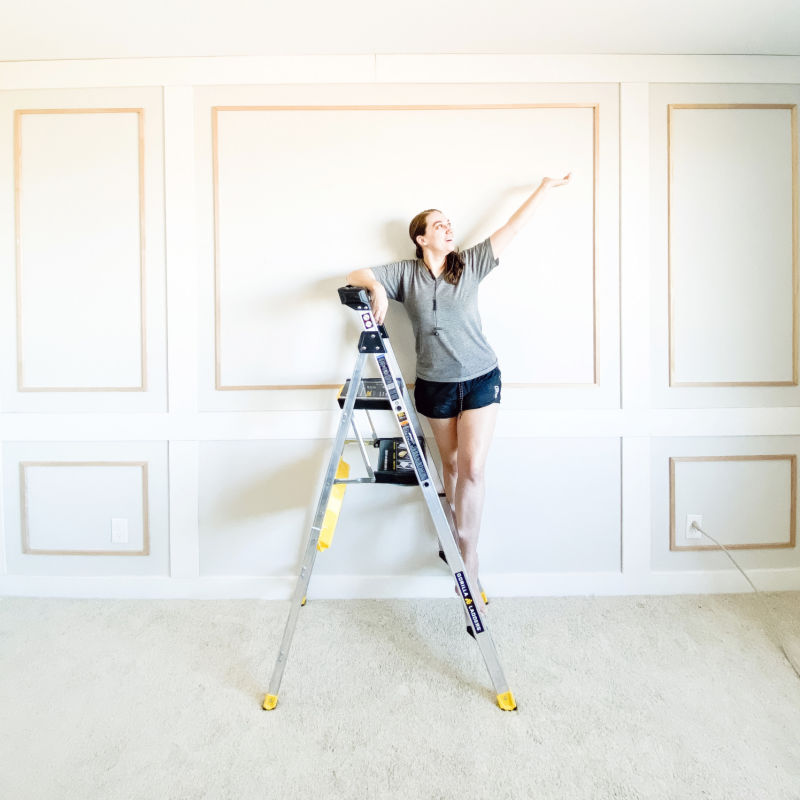
When we moved into our new house, I knew I wanted to makeover our bedroom to create our own little retreat. Think, hotel vibes (can I get room service with that?!)
The easiest way to do this was to add a feature wall. I saw the idea of using picture frame moulding to create boxes on the wall and loved the elegant and timeless look it created.
Let’s get started.
Here’s what you’ll need:
Measuring Tape or Laser Measure
Materials:
Paint (I used Benjamin Moore Super White in a Matte finish)
For a video walkthrough of this project, check out my Instagram highlight here.
Step 1: Measure and Plan
Before you begin, you’ll need to measure your wall and plan out where your boxes will go. For this step, I love to use my trusty laser measure (if you’ve ever used a tape measure over a large span by yourself, you know how annoying it can be when it continually buckles!).
I knew that I wanted to divide the wall into three sections with the middle section being the largest; just slightly wider than my king sized headboard which is 83 inches wide.
Here was my before. Can you tell we just threw everything in here when we moved in and left it?
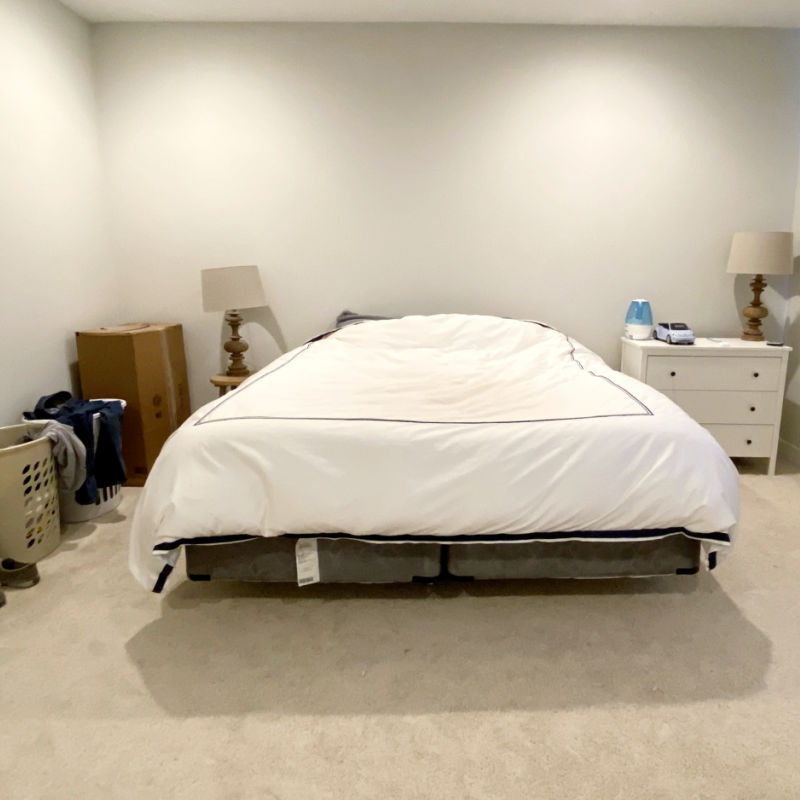
The Before
And here’s my mood board.
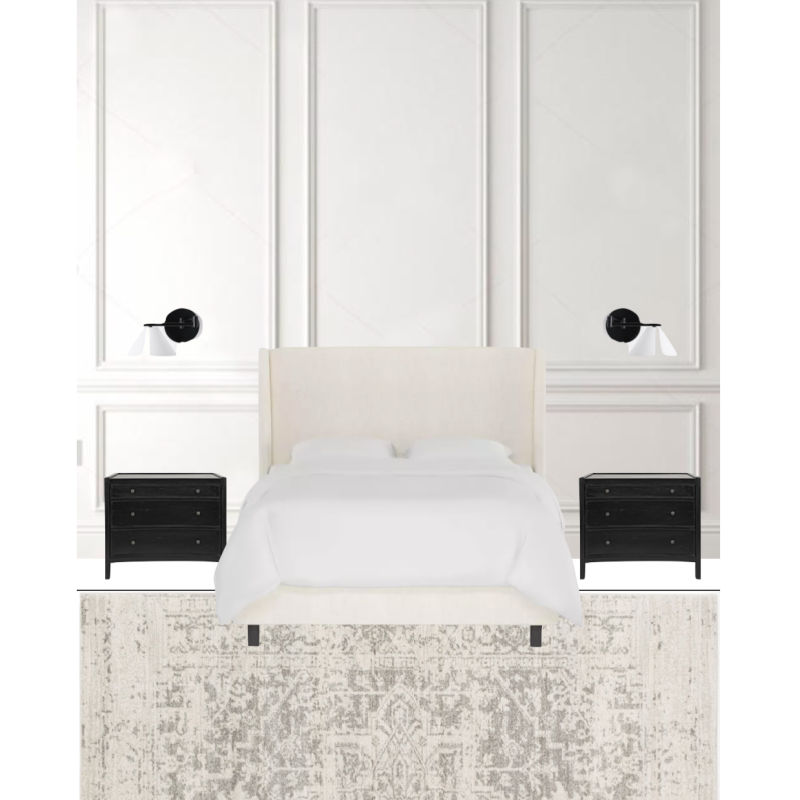
My Mood Board
Step 2: Paint the wall
This is where I made a mistake, so that you don’t have to. I painted everything AFTER putting up all the trim, and let me tell you, that was such a huge pain!
I highly recommend painting the wall the color you want before putting up the trim. Then you can go back and just paint the trim later and you won’t have to worry about fitting your roller or paint brush in all the spaces between the trim to paint the wall.
Step 3: Adding the Trim to the Wall
The first step is to mark out where all of your studs are in the wall. Next, I started adding the trim by framing out the wall with the 1×6 MDF boards beginning with the boards along the ceiling. I held the boards up to the ceiling and confirmed they were straight with my level.
Never trust that your walls and ceilings are straight- always double check with your level. And then I used my brad nailer and 2 inch brad nails to nail the MDF boards to the wall by nailing it into the studs.
Tip: I had to use two 1×6 boards to cover the length on my wall, instead of butting the ends of the boards up to each other, creating an aptly named butt joint, cut each end of the boards where they are going to meet at a 30 degree angle. This helps the boards to fit together more seamlessly and is an easier seam to cover, giving your project a more professional look.
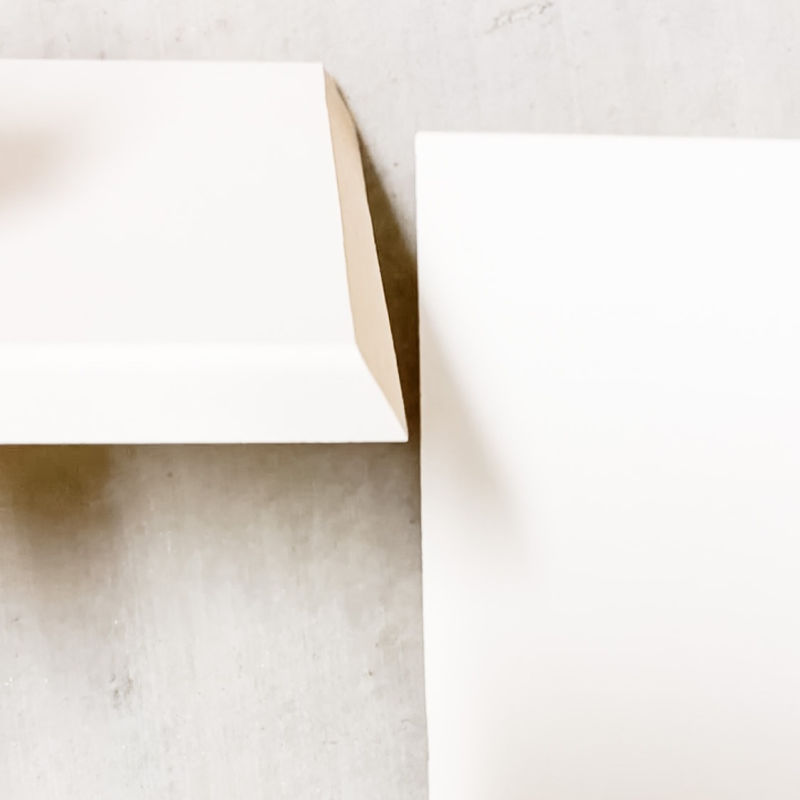
30 Degree Bevel Cut Using a Compound Miter Saw
Once the top boards along the ceiling were installed, I moved on to the second horizontal section. I placed these boards 33 inches above the floor because I wanted them just visible above my 30 inch tall nightstands.
For this, I started by marking where 33 inches was and then used my level to draw a straight line. Then all I needed to do was hold my 1×6 MDF boards up to this line and nail them into the studs using my brad nailer.
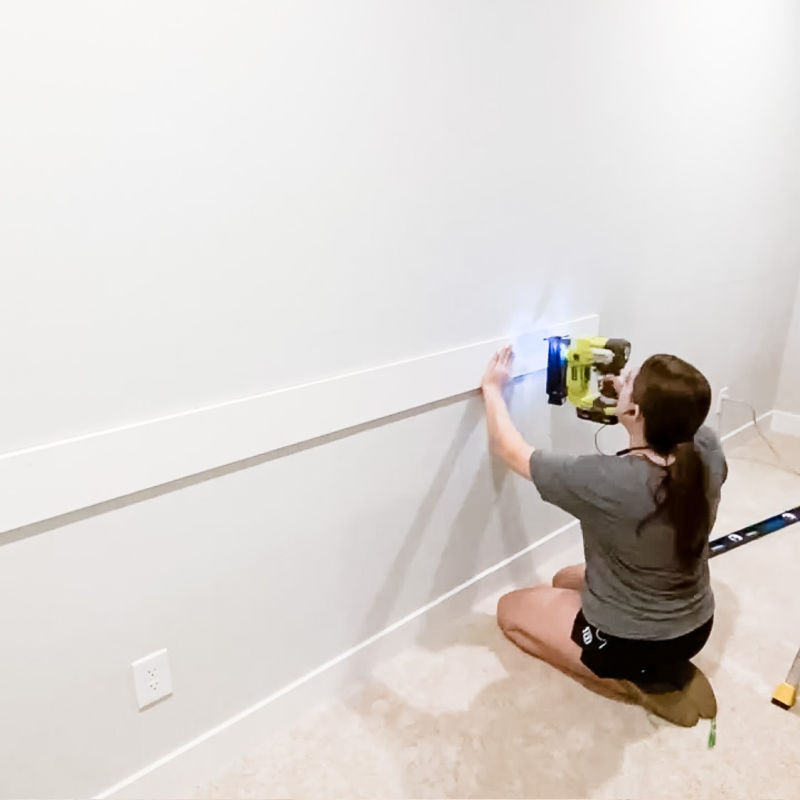
Second Row of horizontal boards at 33 inch high.
Once this section was complete, I moved on to finish framing out the wall by adding the side pieces.
Again, I used my laser measure to measure the distance between the top board and the middle board on each side, as well as the distance between the baseboard and the middle board on each side. I cut those boards to length and attached them to the wall using my brad nailer.
Note: I chose to leave my baseboards as my bottom board since it matched the look I was going for. You could remove your baseboards and replace them with the 1×6 boards.
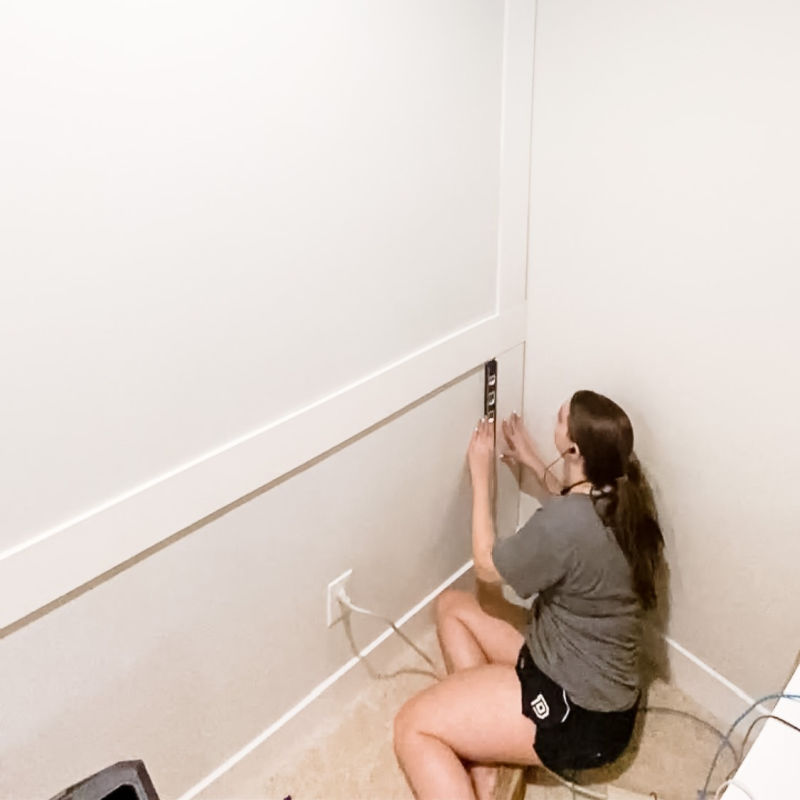
Installing the side pieces, make sure they’re level!
After the wall is framed out using the 1×6 MDF boards, it is time to divide the wall into the three sections. I took the width of my headboard (83 inches) and added three inches to that measurement (86 inches) to give a bit of a buffer so the board wasn’t hitting right on the edge of the headboard.
Then I divided that number in half (43 inches), found the center of my wall, and measured out from the center 43 inches from each side of center, and made a mark. This is where the vertical 1×6 boards will go.
Next you’ll need to take your vertical measurements between the middle horizontal board and the ceiling board and between the baseboard and the middle horizontal board and make your cuts. Then attach the boards to the wall.
If your vertical boards do not hit studs, you can angel your brad nails into the wall so that they better grip the drywall. However, if you do not know what is behind your wall, then nail off of the stud at your own risk, as you could hit plumbing, etc.
You could use dabs of Liquid Nails to attach these boards if you are worried about hitting something with a nail but be aware that if you remove these boards in the future, you’ll need to patch the drywall where the Liquid Nails was, so use sparingly!
If you do decide to use nails, I recommend using short nails to minimize your risk of damaging anything.
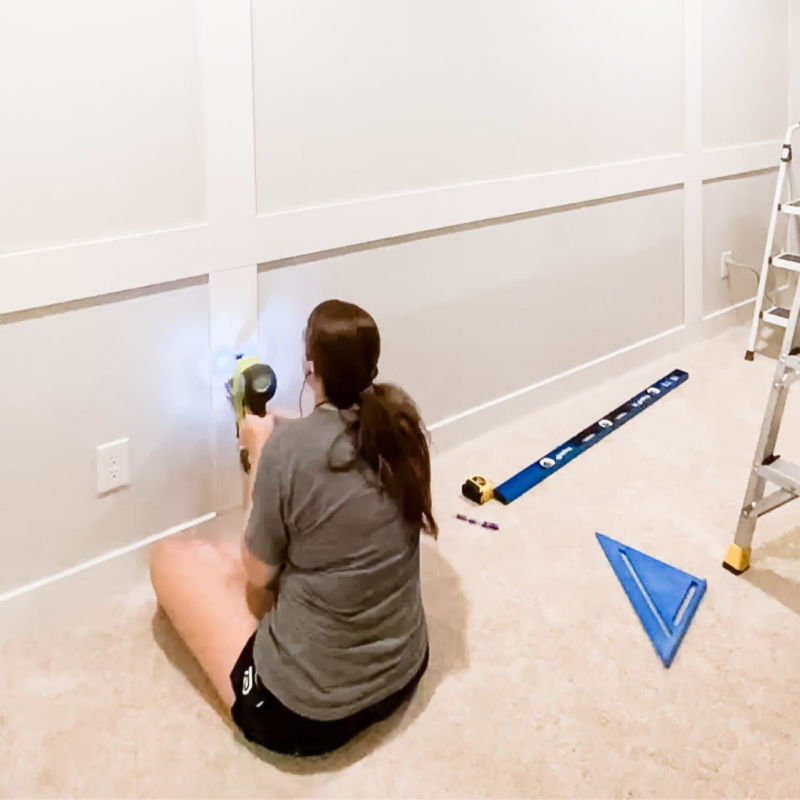
Using Brad Nailer to install the middle pieces.
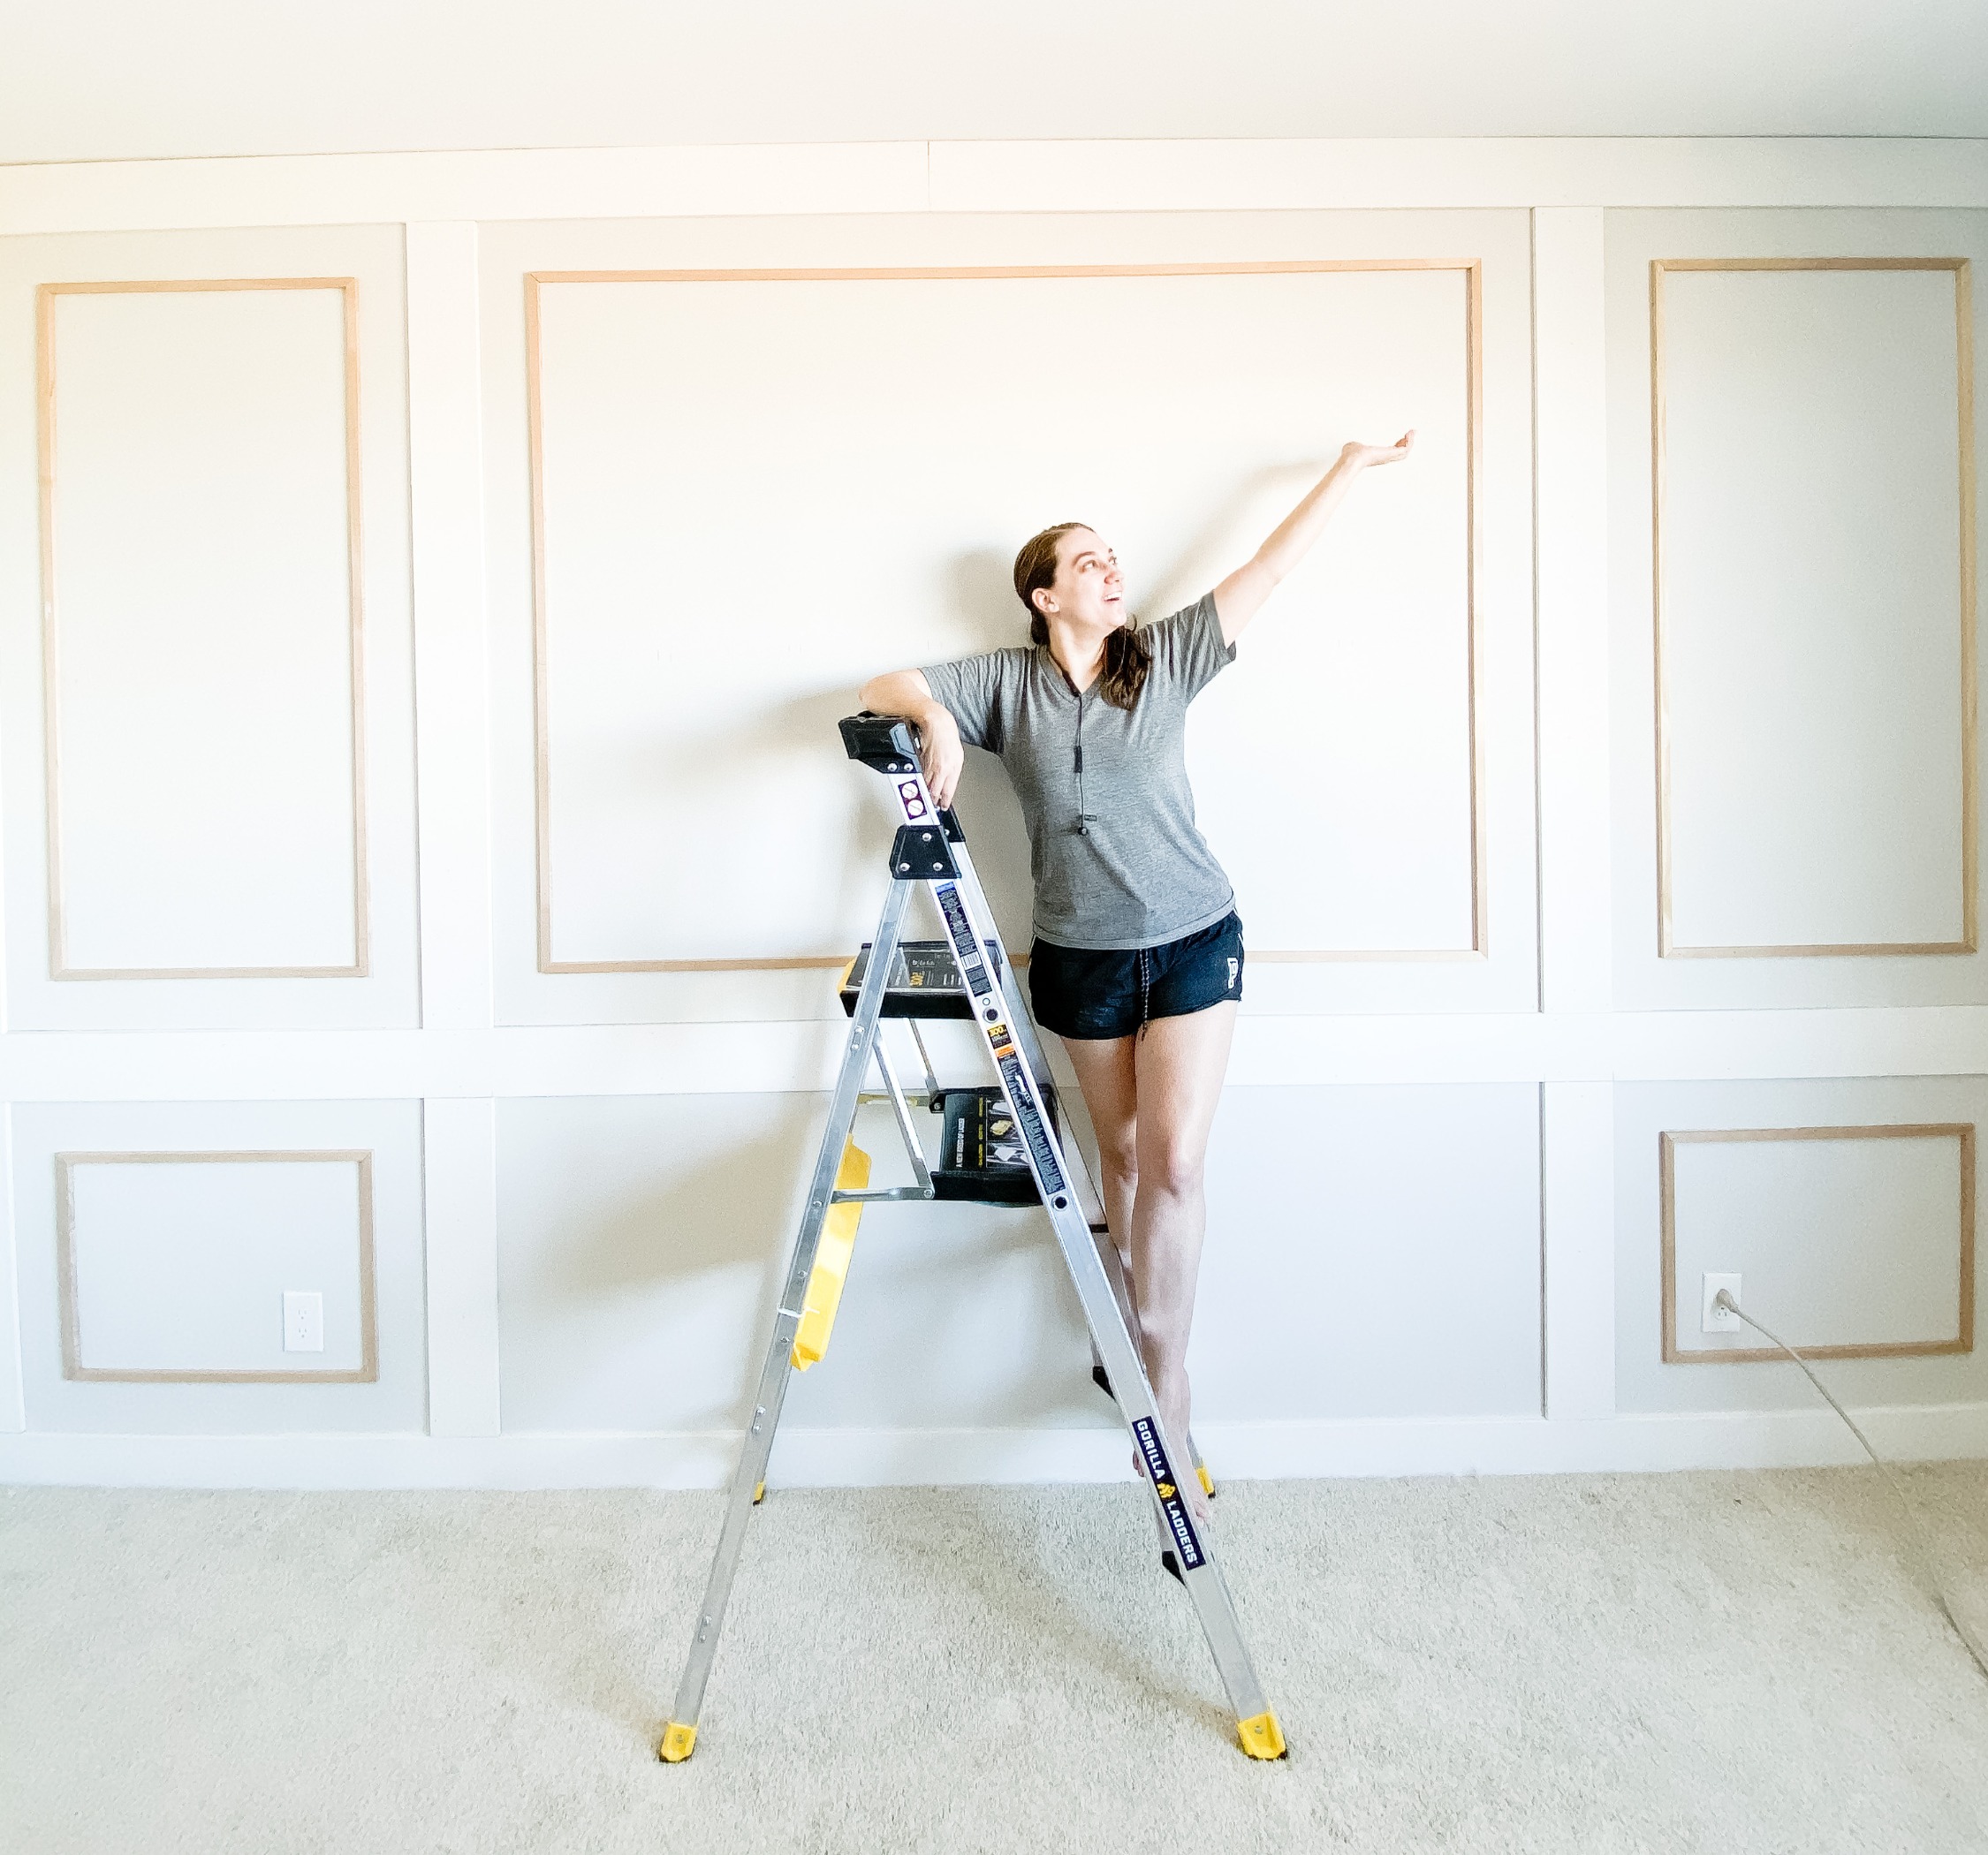
Now that all your 1×6 MDF boards are attached to the wall, it is time to attach the smaller boxes. Here you’ll use the 1/2 inch X 3/4 inch pine trim. I decided to inset these boxes 5 inches from the larger boxes. I cut a scrap piece of MDF to 5 inches and held this around the MDF to draw my lines for where the pine trim would go.
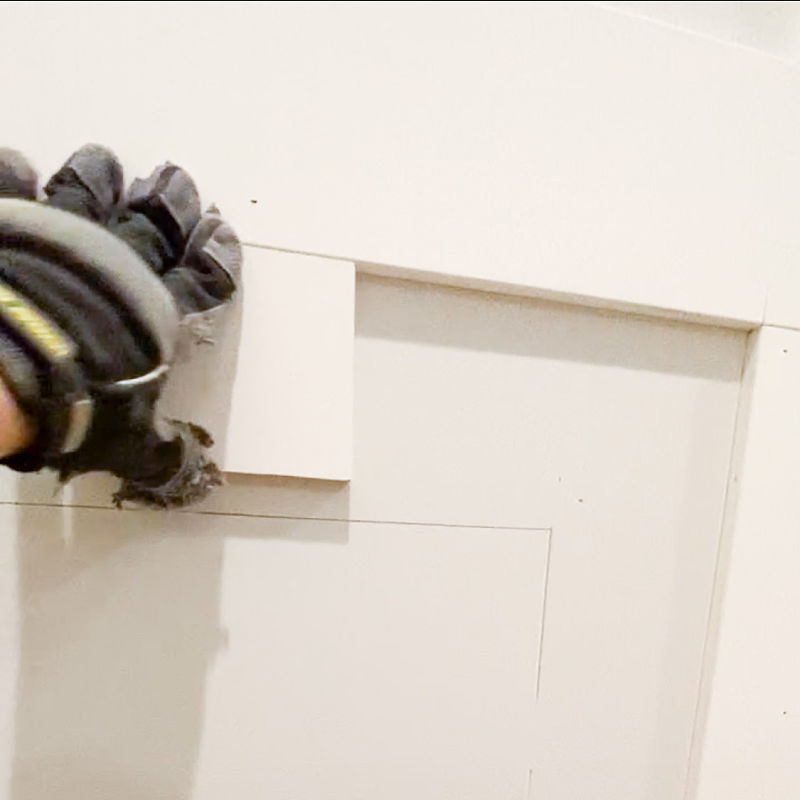
Create a spacing block to help keep things even
Next, I measured the length of the lines I drew, and cut the trim to length. For these, I did miter the corners, meaning I cut the ends where the two trim pieces meet together at 45 degrees.
You could do butt joints here if you prefer. Then continue this process for each box. I did not do the center bottom box as it will be completely covered by the bed.

Marvel at your hard work!
Step 4: Wood Fill and Caulk
Now it’s time to wood fill all of the nail holes you created. Use wood filler and press it into the nail hole, while slightly over filling, because wood filler shrinks as it dries.
Once completely dry, you’ll sand everything smooth. After sanding, caulk all the seams where the trim meets the wall.
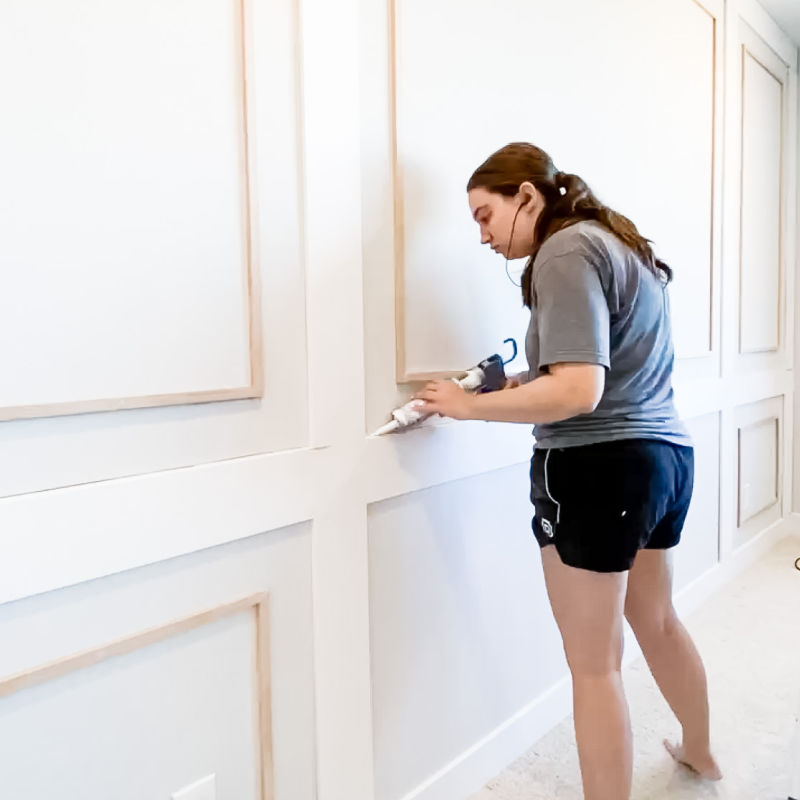
Caulk where the trim pieces meet the wall.
Step 5: Paint (again!)
Once everything is seamless, you can paint all the trim to match the wall. For this wall, I used the paint color Super White by Benjamin Moore.
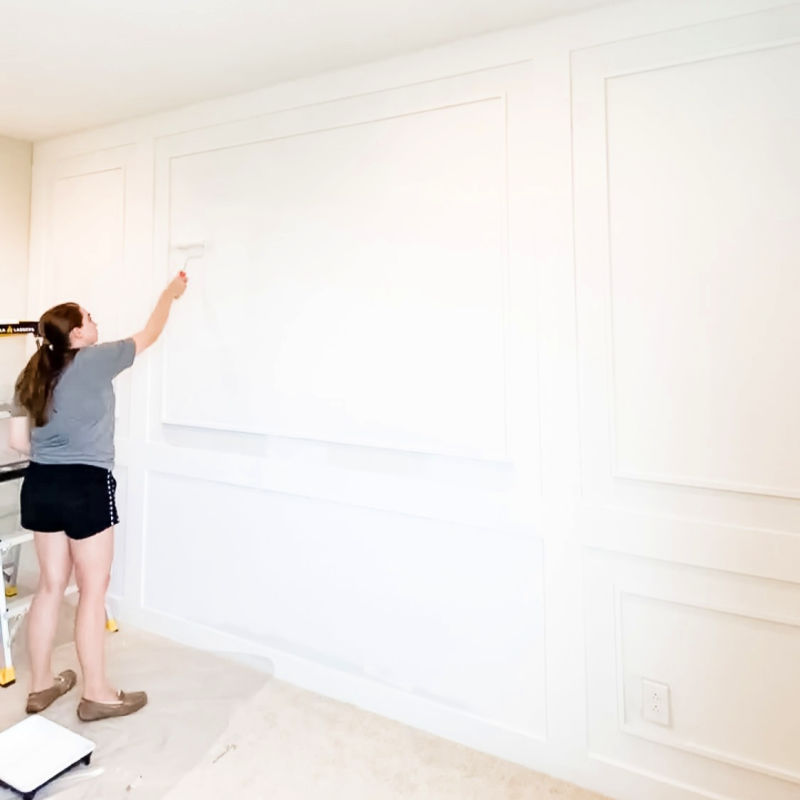
Paint to see the transformation!
Now it’s time to decorate your room and pretend like you’re finally on that vacation you’ve been dreaming about!
I decided to add wall sconces on either side of the bed. You could hire an electrician to hardwire them but since I wanted them more for looks than function, I decided to do a hack.
I attached the mounting base for the sconce to the wall with wall anchors and screws, then snipped the wires and coiled them up into the base and attached the front.
If you want them to put off some light, you could use command strips to adhere a puck light to it, or you could use rechargeable light bulbs.
Check out my light hack in more detail here.
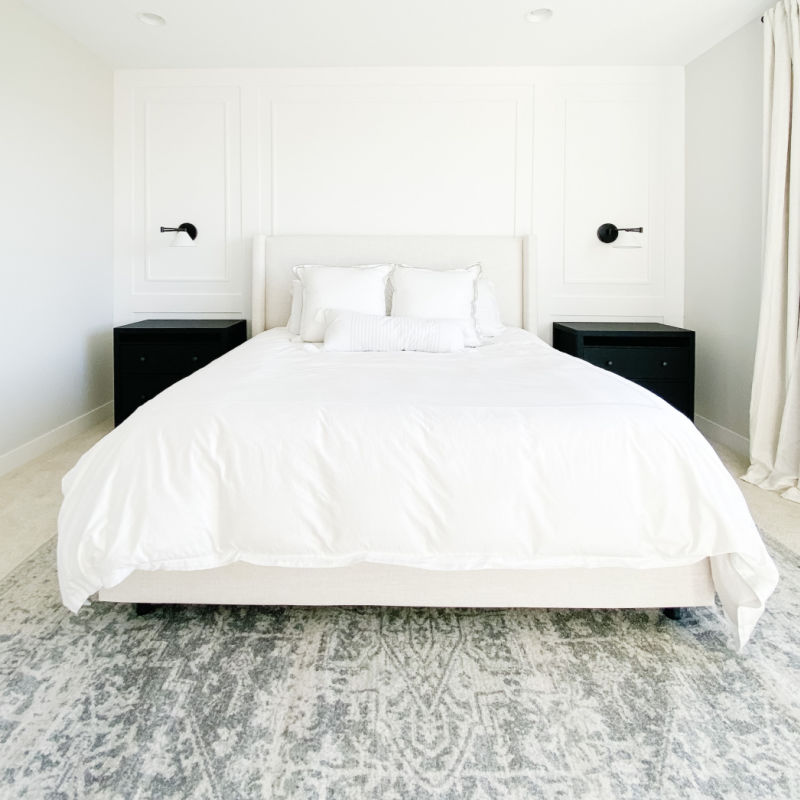
Enjoy Your New Retreat! Room Service Anyone?!
Ta-Da! Your bedroom retreat is complete. Enjoy!
You did it! Your accent wall is now complete. I suggest a nice long nap in your new resort style bedroom – you deserve it.
Let me know how your project turns out by tagging me on Instagram @handtreatedhome, I’d love to see it!
Questions? Email me at hello@handtreatedhome.com or feel free to leave any questions or comments below!

