How to Decorate Shelves
This post is in collaboration with Desenio. Thank you for supporting the brands that we love and that help support Hand Treated Home.
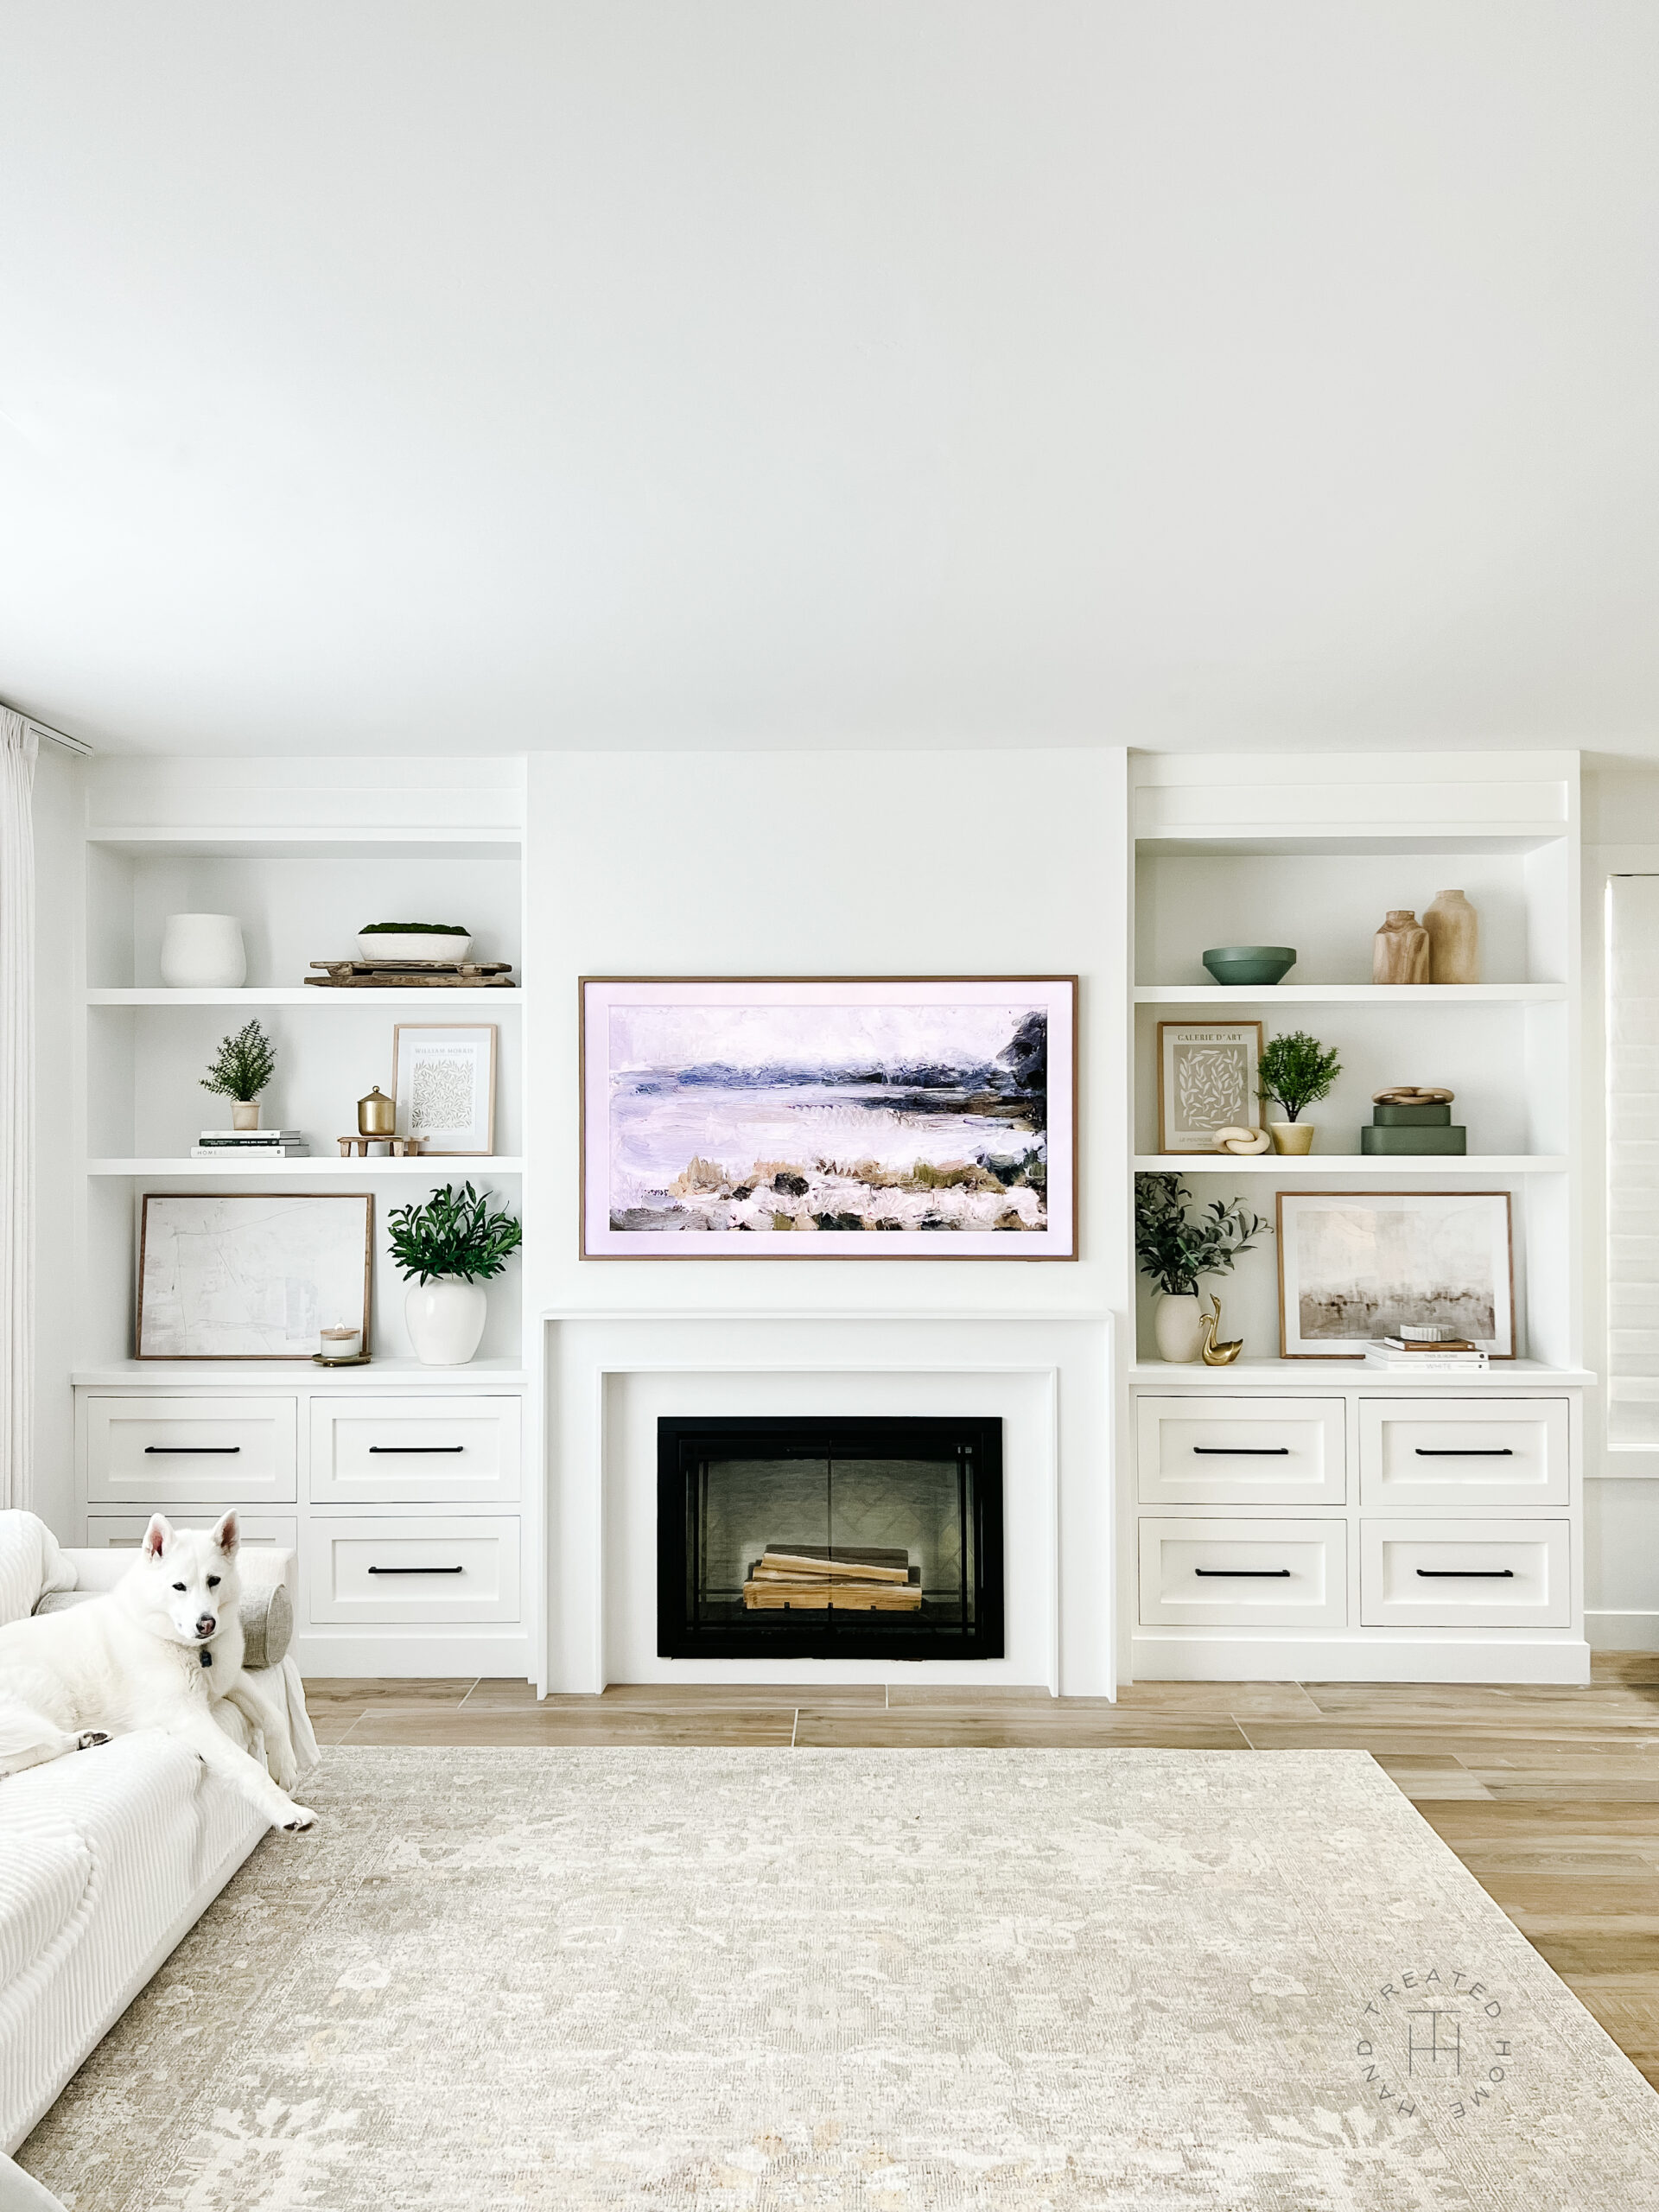
Recently I completed a DIY build that was 2.5 years in the making. I started by building an electric fireplace, then added builtin cabinets and now finally finished by adding built in shelves. Now that they are done though comes the tough question of of how to decorate shelves.
I used to struggle quite a but with decorating shelves, and to be honest sometimes I still do. However, there are a few basic principles and rules to follow that can make decorating shelves much easier.
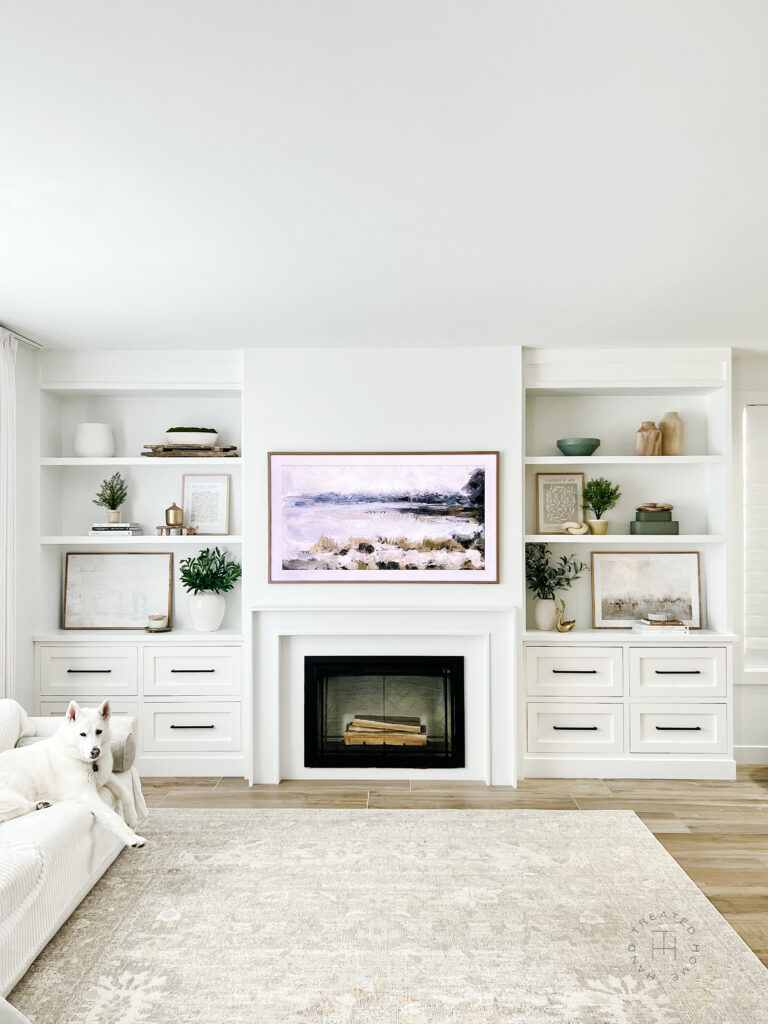
One of my favorite ways to decorate shelves is to use art. Art can be easily swapped out and moved around. The look of it can be completely changed and refreshed simply by changing the frame or the mat. Best of all, art can easily fill the shelves without needing a bunch of extra objects.
I recently discovered Desenio as a place to buy art and I was blown away by their selection. To make it even easier, you can also purchase frames and mats directly from them as well. But my favorite thing, and what made decorating my shelves so much easier, was the Gallery Wall Tool that they have on their website.
It is actually for gallery walls, another tricky decorative frontier, but I was still able to use the tool to help me visualize the art for my shelves. This is helpful because a key part of decorating shelves is to make sure you have coordinating elements that flow together.
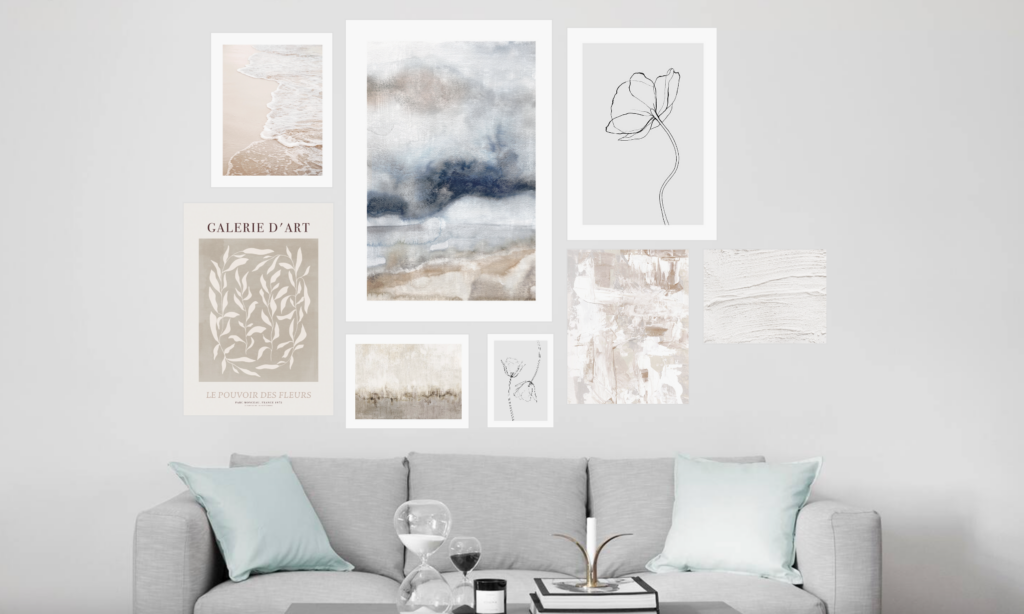
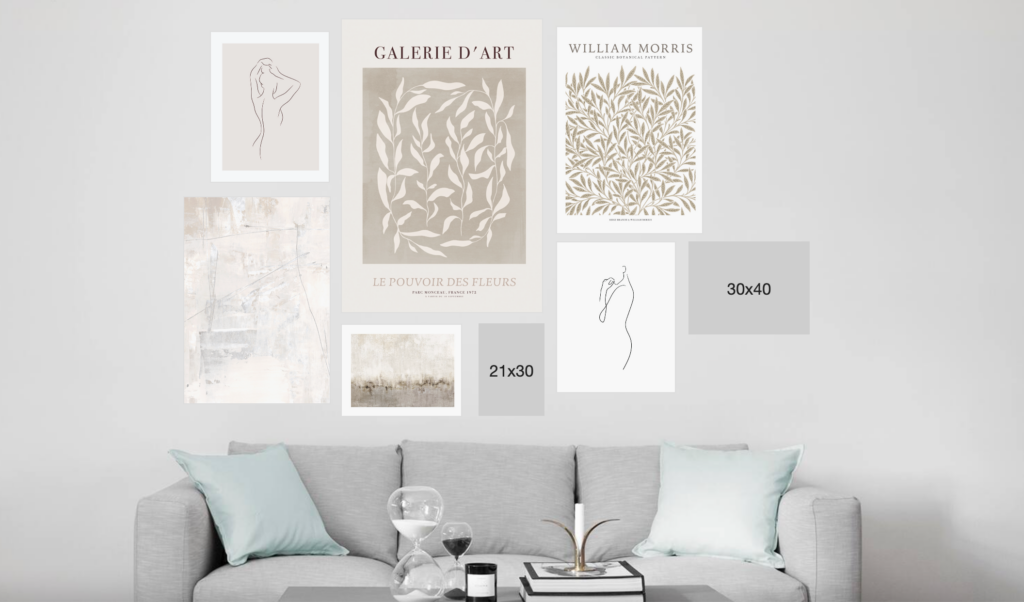
Using their visualizer I was able to easily plug in and swap out different pieces until I found the combination that was perfect. Then I chose my sizes and frames and had the perfect combination of artwork for my shelves sent right to me.
I have been really loving abstract art lately, and it is the perfect backdrop to use in any space, but it works especially well when decorating shelves.
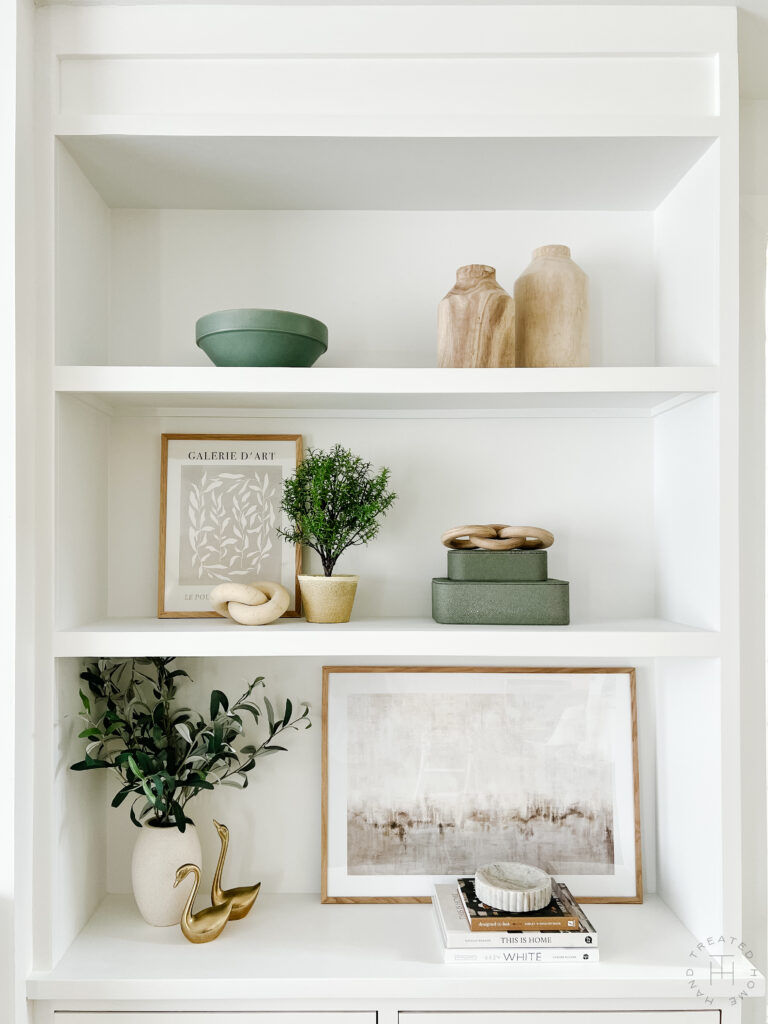
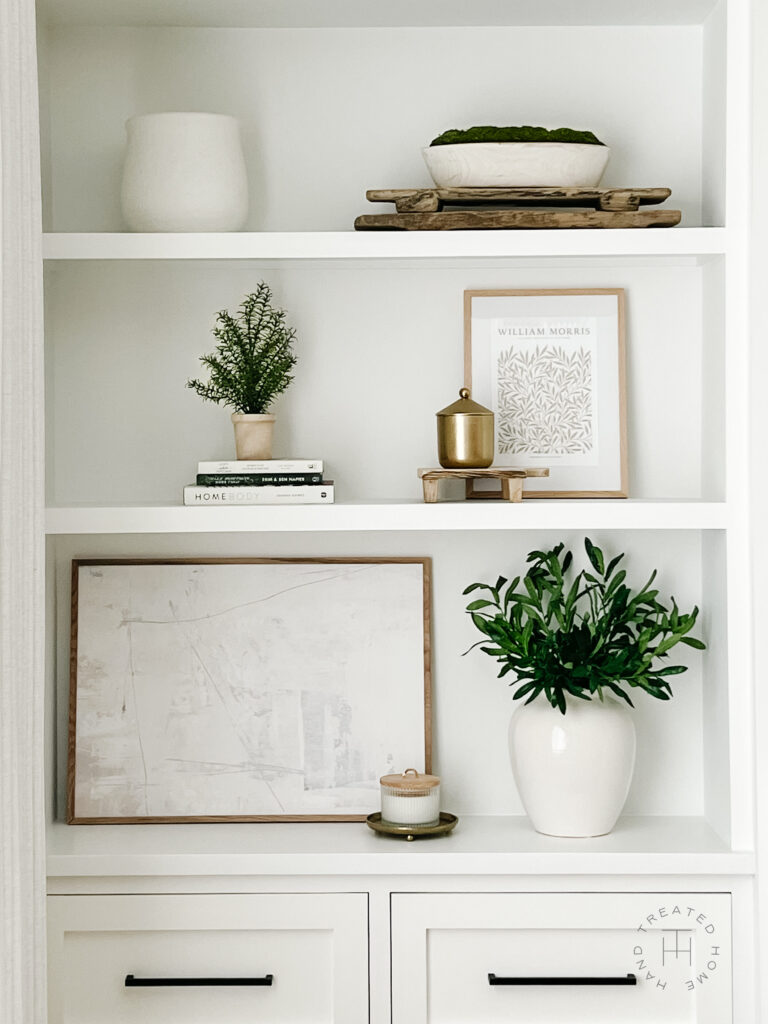
My order included these prints: Abstract Acrylic Painting No6 Poster, Abstract Scenery No1, Le Pouvoir des Fleurs No1 Poster, William Morris – Beige Branch Poster
I loved the look of the light oak wood frames that they had as well. It is such a gorgeous tone and really helped pull all my wood elements together. They had quite a few frame and mat options which you can check out here.
Now that we know how to easily pick out art to decorate with, let’s turn to what to do with the art once it arrives.
Here are the steps that you need to follow in order to decorate your shelves:
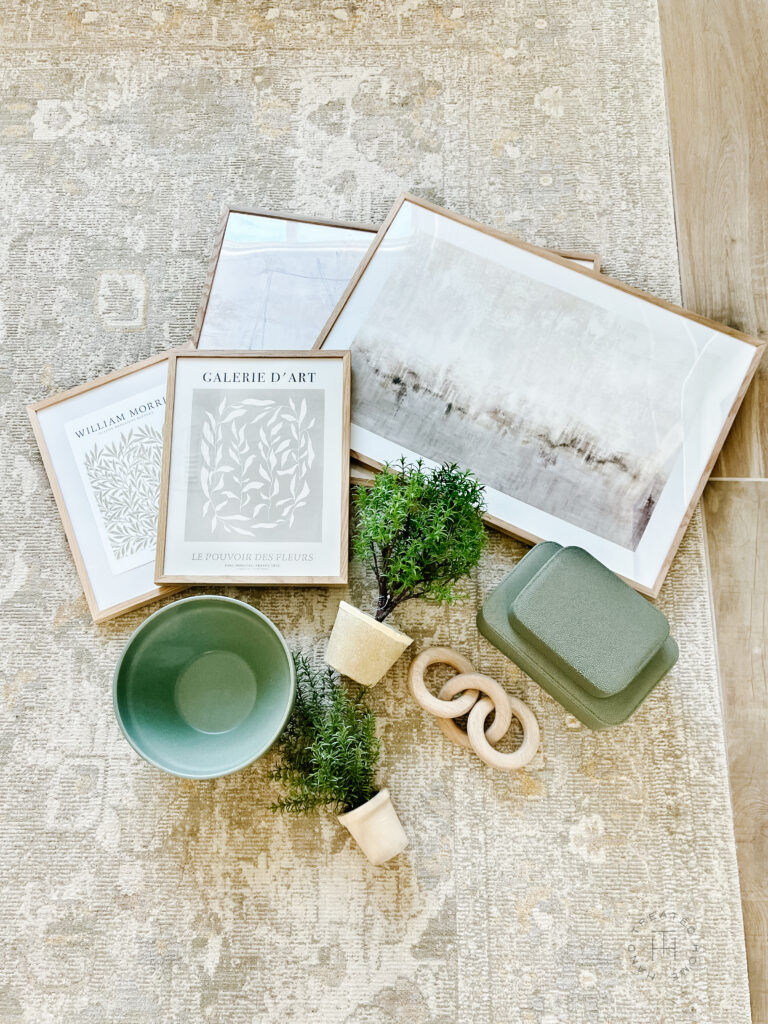
Decorate Shelves Step 1: Gather your items
Now I don’t necessarily mean go shopping and buy all new things. Honestly that might just be overwhelming. I would suggest starting by shopping your own home. I bet you already have quite a few items that would work perfectly when decorating your shelves.
Start by gathering items such as: frames, art, vases, bowls, pottery, books, plants (real or faux!), figurines, baskets and small lamps.
As you are gathering, try to get a mix of sizes and textures while also paying attention to the style and color palette that you are going for. Think about how much height you have on your shelves to play with pieces of varying size, and grab some larger items. It’s great to have fewer larger items than a bunch of little objects so that the shelves don’t look too crowded.
Decorate Shelves Step 2: Color Palette
Now that you have gathered items to decorate your shelves with, it’s time to determine your color palette. Look at everything you have gathered, do you see any colors repeated? Do you have a lot of black items or blue or wood tones? Pick 1-2 colors to focus on and then surround those with neutral items that are cream, white, gray, etc.
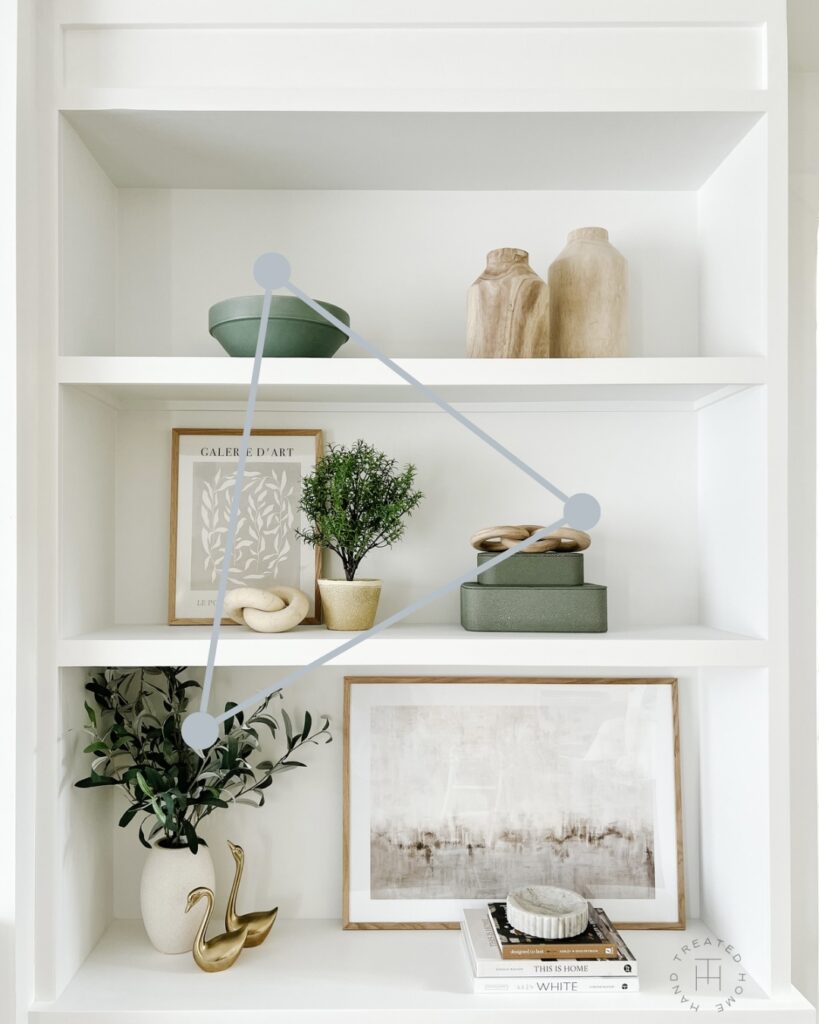
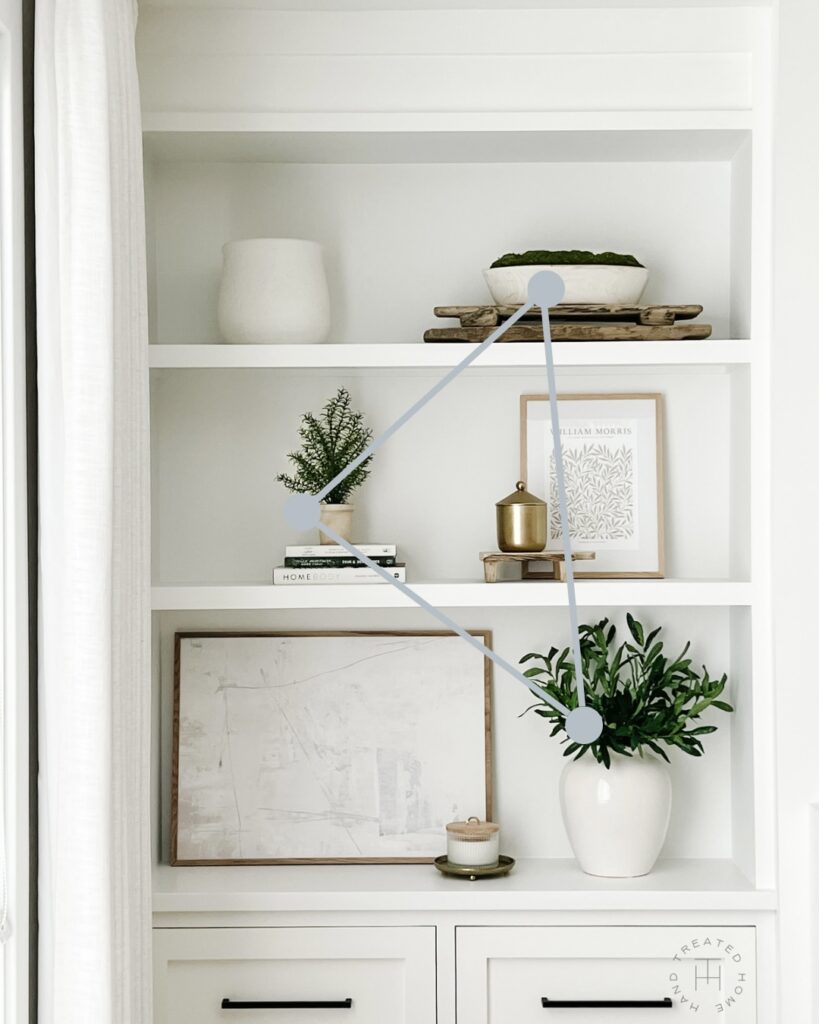
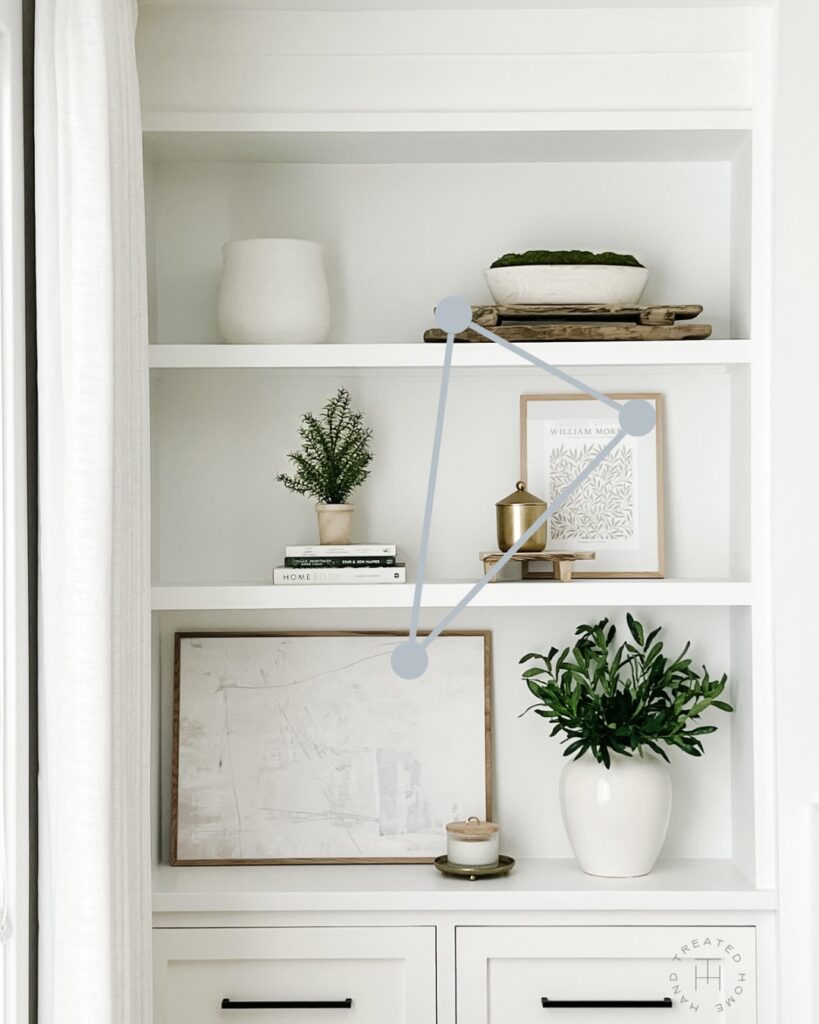
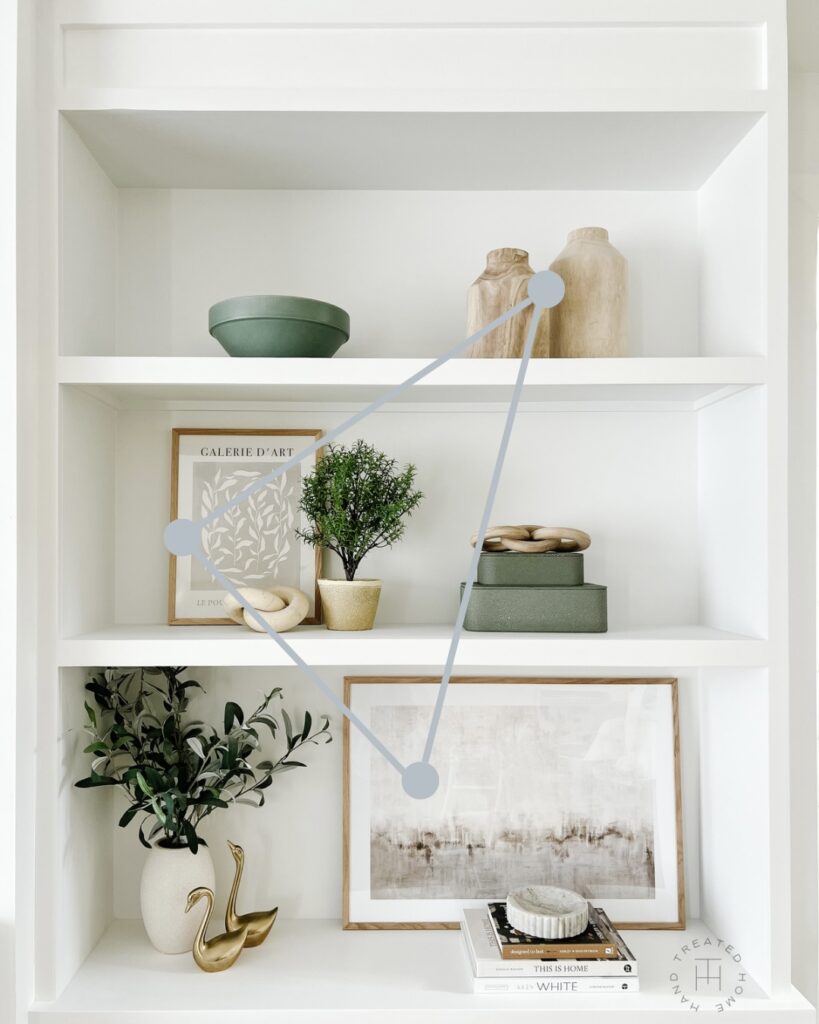
Take the items in the color you are going to focus on and spread them throughout the shelves. You want them on different shelves creating a zig zag pattern or triangles. This helps the eye easily move throughout the objects on the shelves, easily landing on the color of focus and glancing at the supporting objects.
Decorate Shelves Step 3: Layout
Now that you have the colors sorted out it’s time to focus on the layout of the objects on the shelves. You want to have objects of varying heights for visual interest, and also different groupings. Groups of 1 or 3 are very visually appealing, so try to either place items alone, if it is a large statement piece like a basket or bowl, or group smaller items in groups of 3 with varying heights.
Depending on the width of the shelf you can have one object by itself, two grouping of objects, or three groupings. You want each shelf to vary from each other so try to vary these throughout the shelves. For example, if one shelf has one statement object, do two groupings on the next shelf instead of repeating just one item.
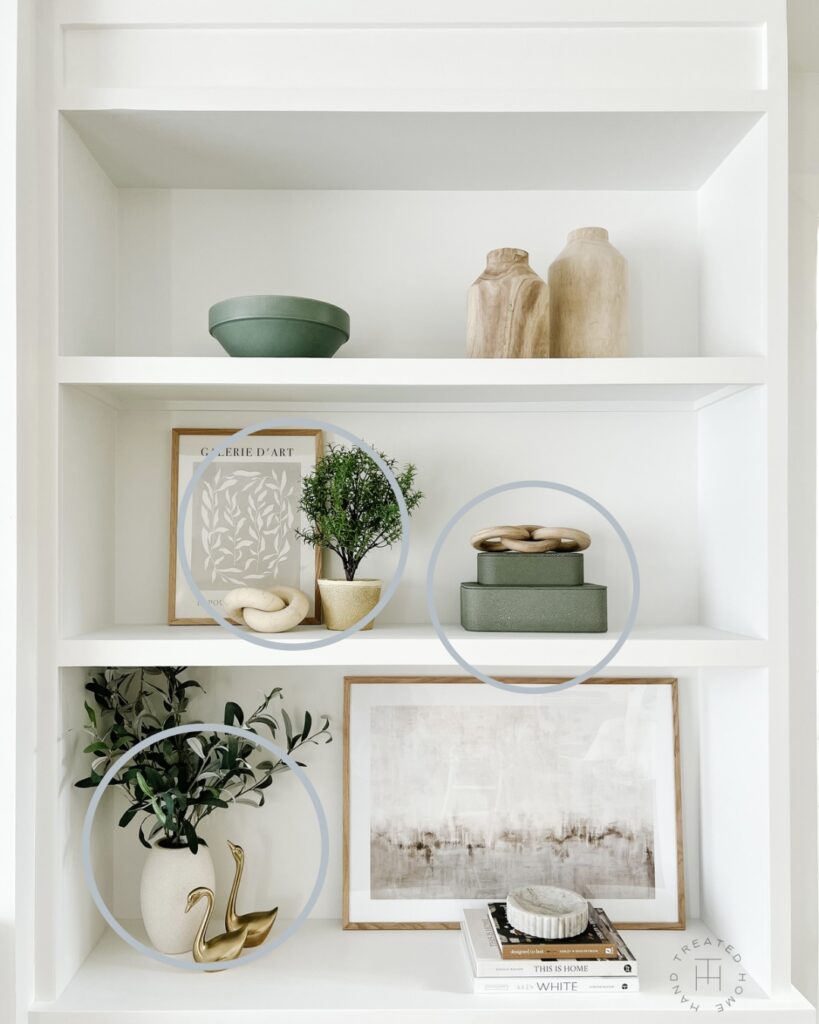
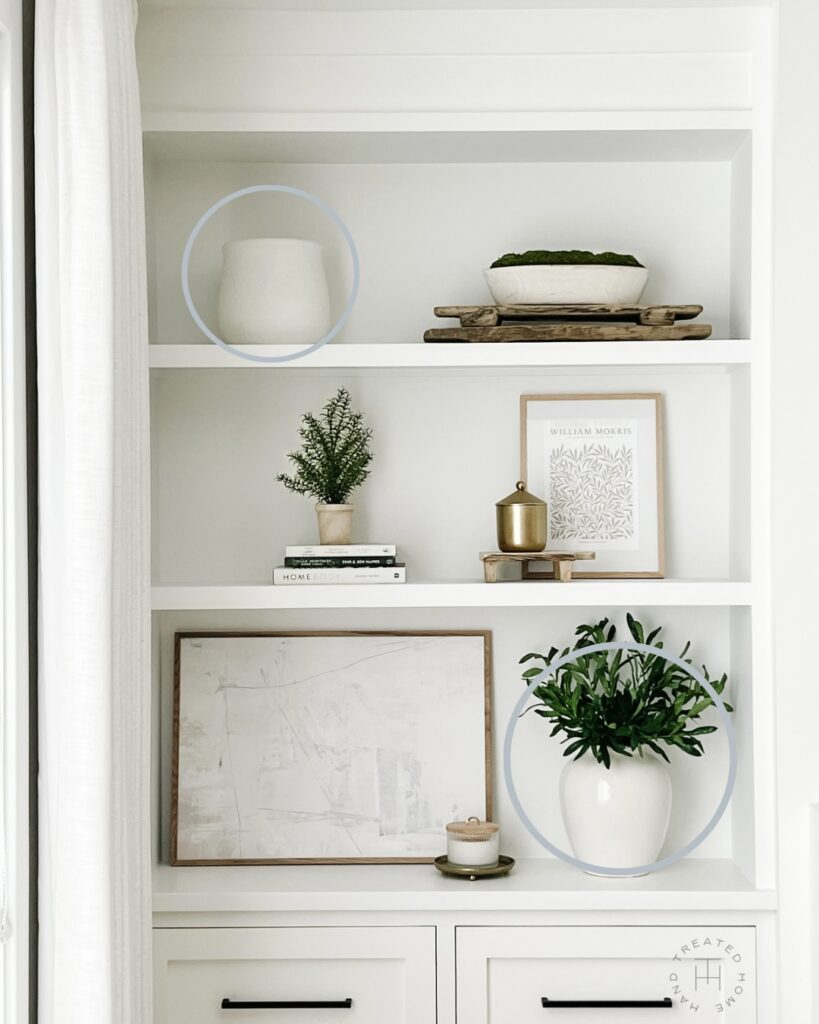
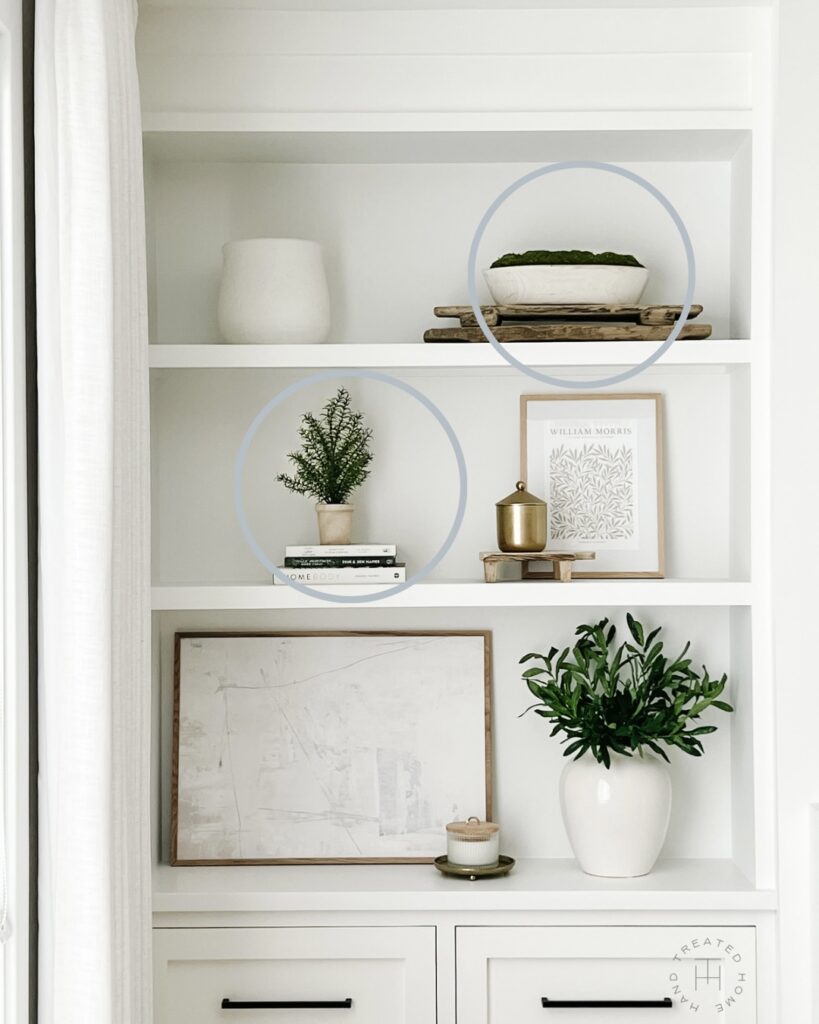
Decorating Shelf Tips:
Make sure you are frequently taking a step back to look at the shelves. Sometimes even taking a picture and then looking at it on your phone can help you see what needs to be adjusted.
Start with your favorite must have items on the shelves and then add to them
If you feel stuck, try removing some items. A common mistake is to over decorate shelves and add too much. Having space and breathing room is a good thing.
A good go-to is to stack books on their side and add a small vase or object on top of them for height.
Greenery is a great way to bring shelves to life. They add vibrancy without having to add a bunch of colorful objects.
Remember to focus on 1-2 main colors and fill the rest with neutrals. This is where the art visualizer can come in handy. Easily find art that has your main colors in it, or pieces that can act as a neutral backdrop.
Artwork is a great staple when decorating shelves. There are so many different sizes and is easy to color coordinate with each other for a cohesive feel. Desenio has so many great options for you to choose from. You’re sure to find something to help take your shelf styling to the next level.
I hope this post was helpful and that you now feel more confident trying to decorate shelves. Let me know if you try out and of my tips!
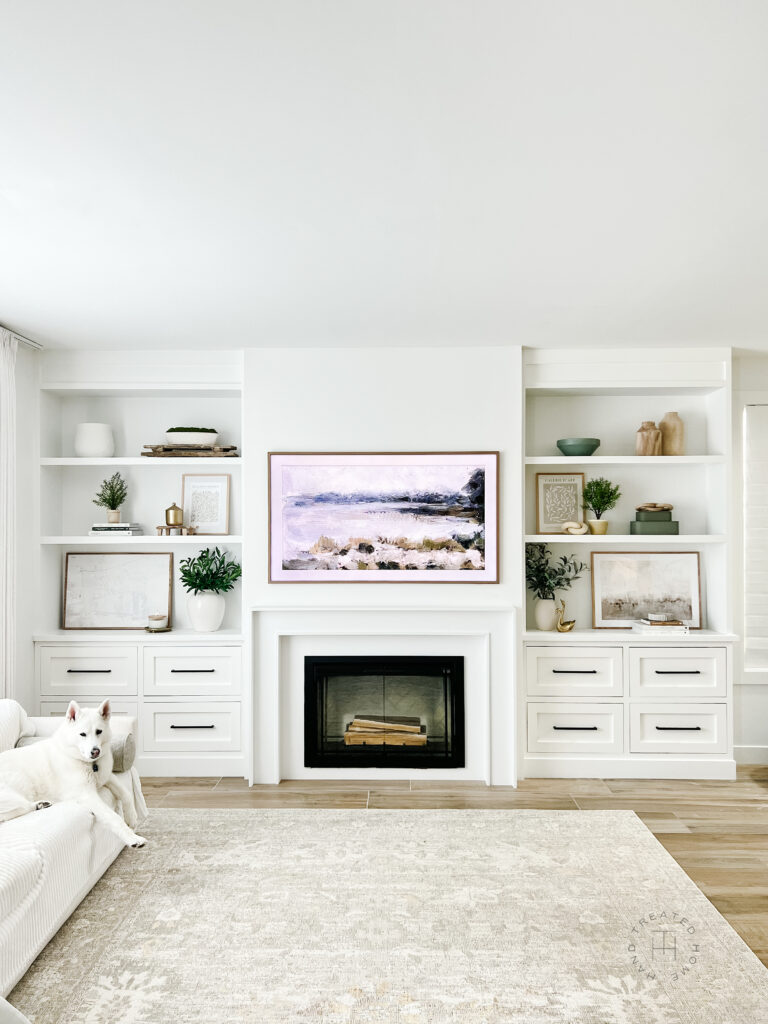
Tag me on Instagram @handtreatedhome so I can see your shelves!
Questions? Email me at hello@handtreatedhome.com or feel free to leave any questions or comments below!
