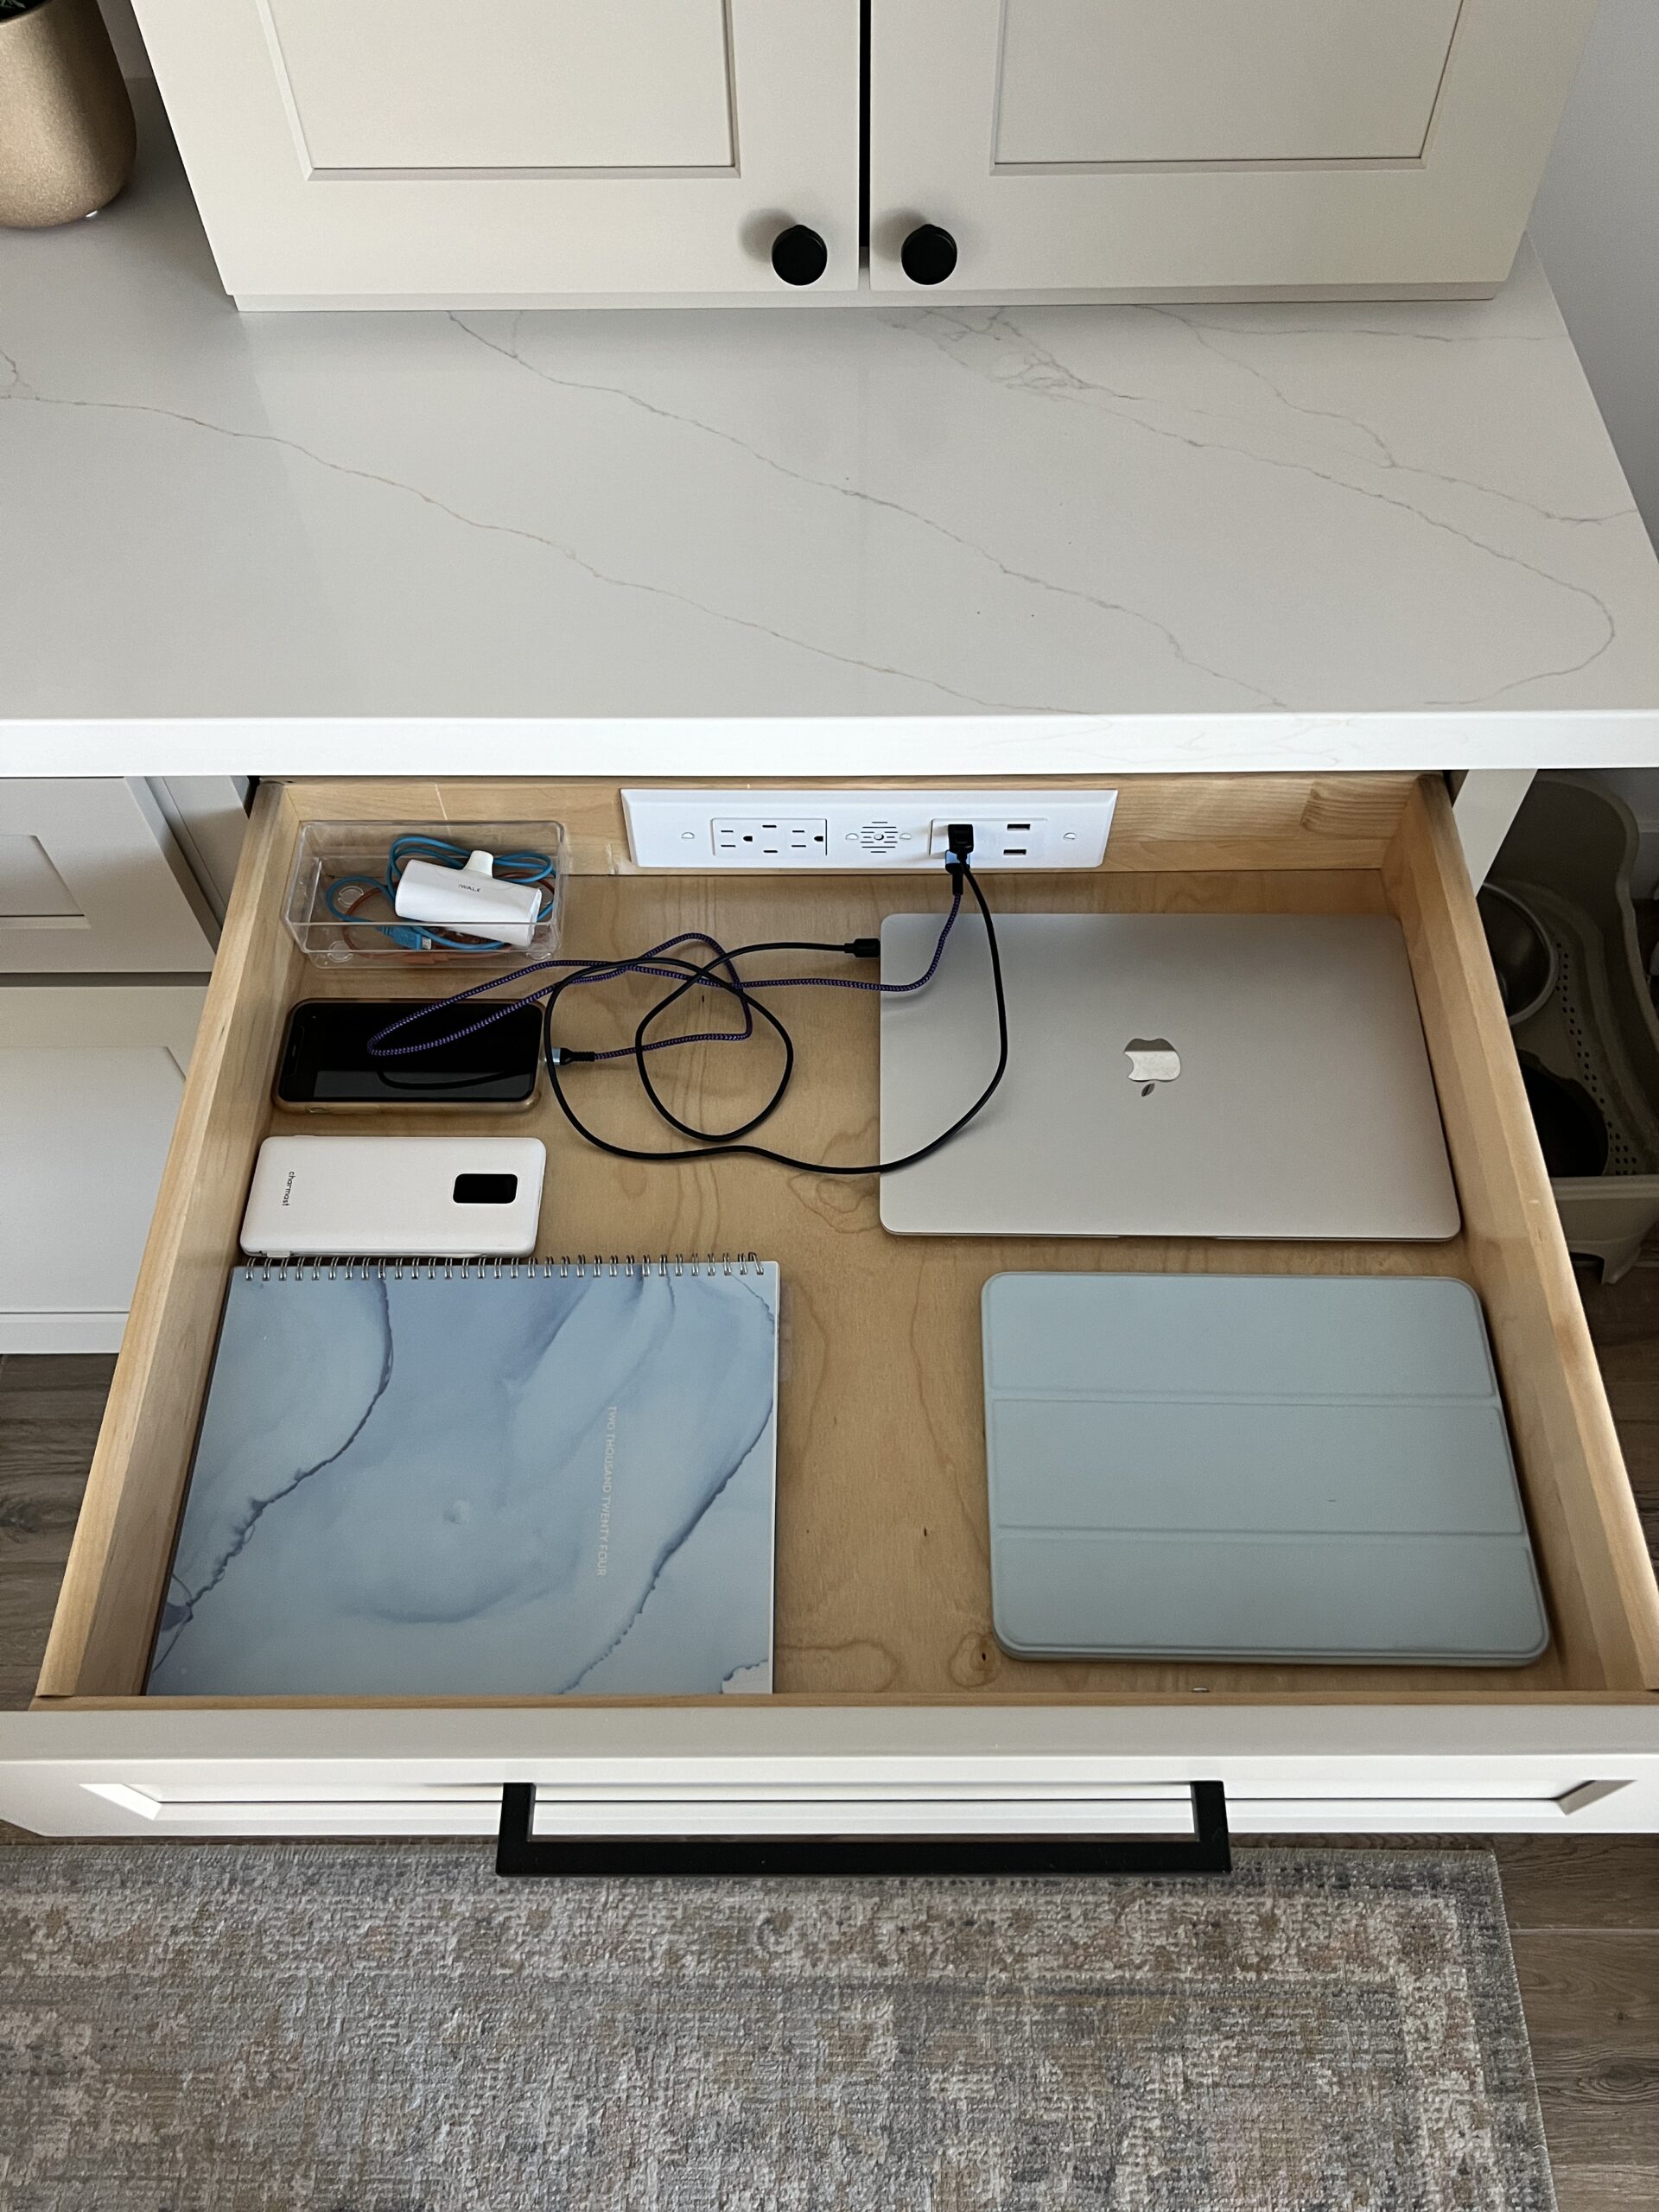
Charging Drawer for Cord Management
This post is in collaboration with Docking Drawer. All opinions are my own. Thank you for supporting the brands that we love and that help support Hand Treated Home.
This page may include some affiliate links, meaning that at no cost to you, I could earn a commission if you purchase through these links. Learn more. As always, I only link items that I personally use and recommend. Thank you for your support by shopping through my links.
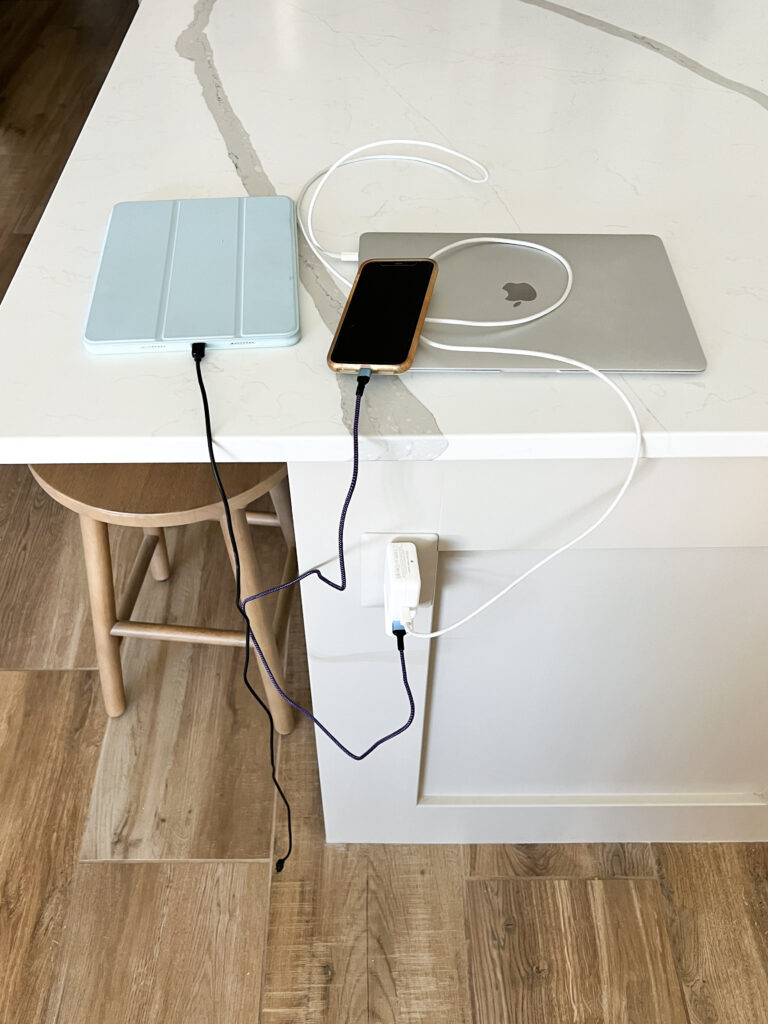
We all have it. That counter top that is always cluttered with cords. Where the whole family drops their various tech gadgets to be charged and so it always looks like a tangled mess. I have long tried to find a solution so that my countertops don’t have to spend an eternity covered in cords and half charged iPads and phones and I’m happy to say that I have finally found the perfect solution: a charging drawer.
Enter: Docking Drawer. An in drawer power outlet that makes it safe to charge all of your electronics and tech gadgets while they are neatly tucked away, out of sight, in a closed drawer. You don’t have to worry about it over heating because Docking Drawer has a built in thermostat safety feature that will de-energize the outlet if it gets too hot, giving you and your family a charging drawer and peace of mind.
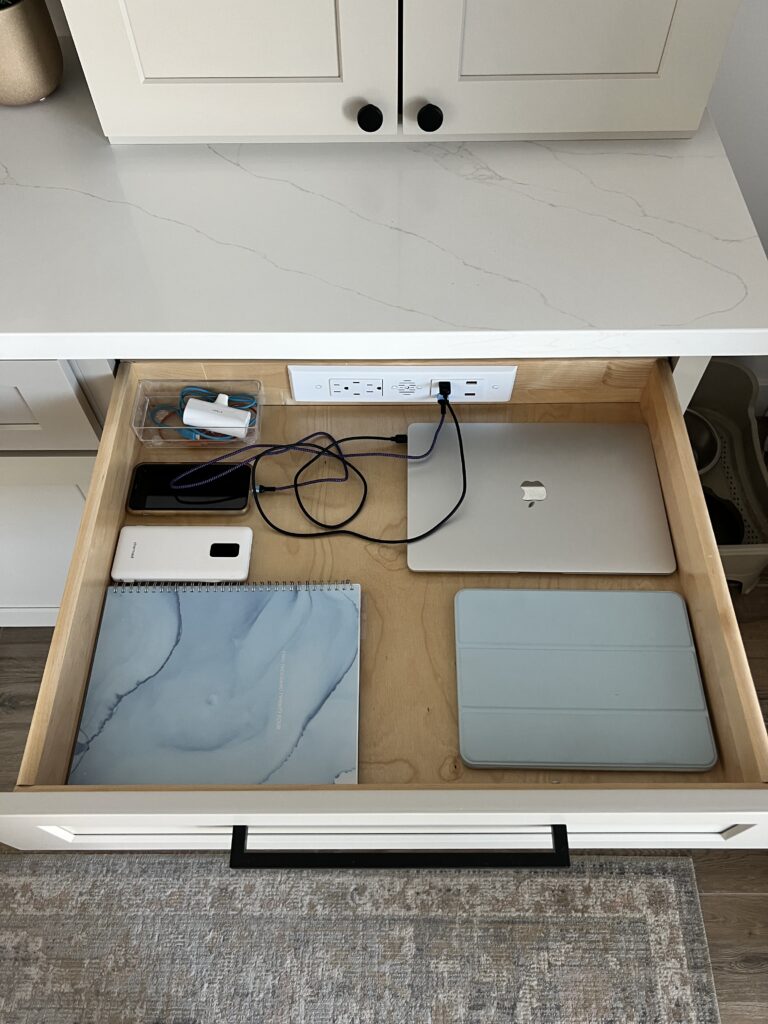
The best part is that you can even install it yourself. Let me walk you through how easy it is to say good-bye to cord clutter.
Supplies:
Docking Drawer Outlet – This is the one I used but they have several to choose from. Not sure which is best for you? They can help you select the best outlet for your needs.
Drill
1/2 inch Drill Bit
Tape
Jig Saw
Straight edge/Level
Pencil
Measuring Tape
Flat Head Screw Driver
Cutout Template
Step 1: Cut out Hole for Outlet
First you need to cut out the template from the instructions and identify which side of the template you need to use.
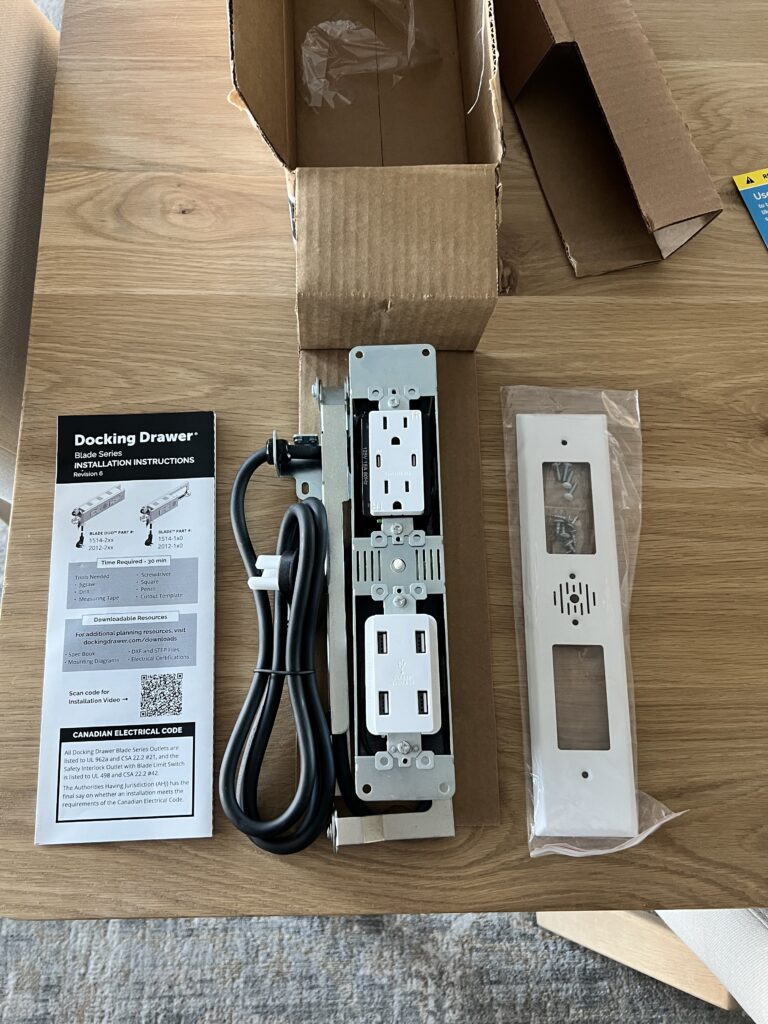
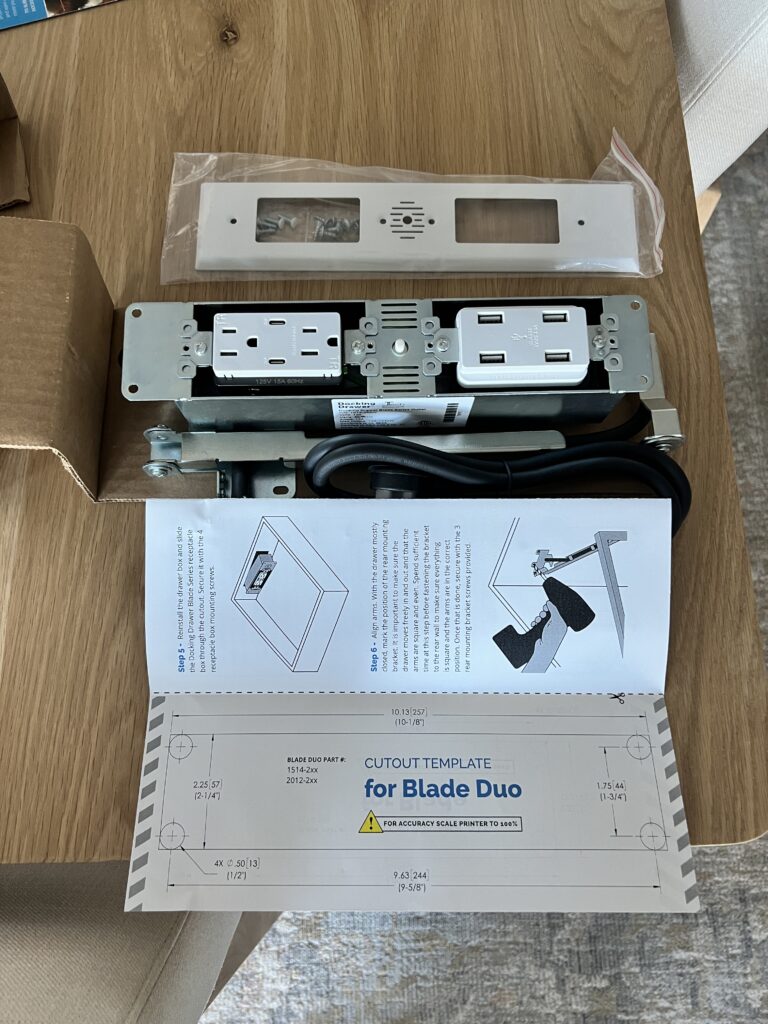
Then decide where on the back of the drawer you want to install it. I chose to place mine centered along the back of the drawer. Confirm that this placement works with the arm and with the location of the plug and wall outlet.
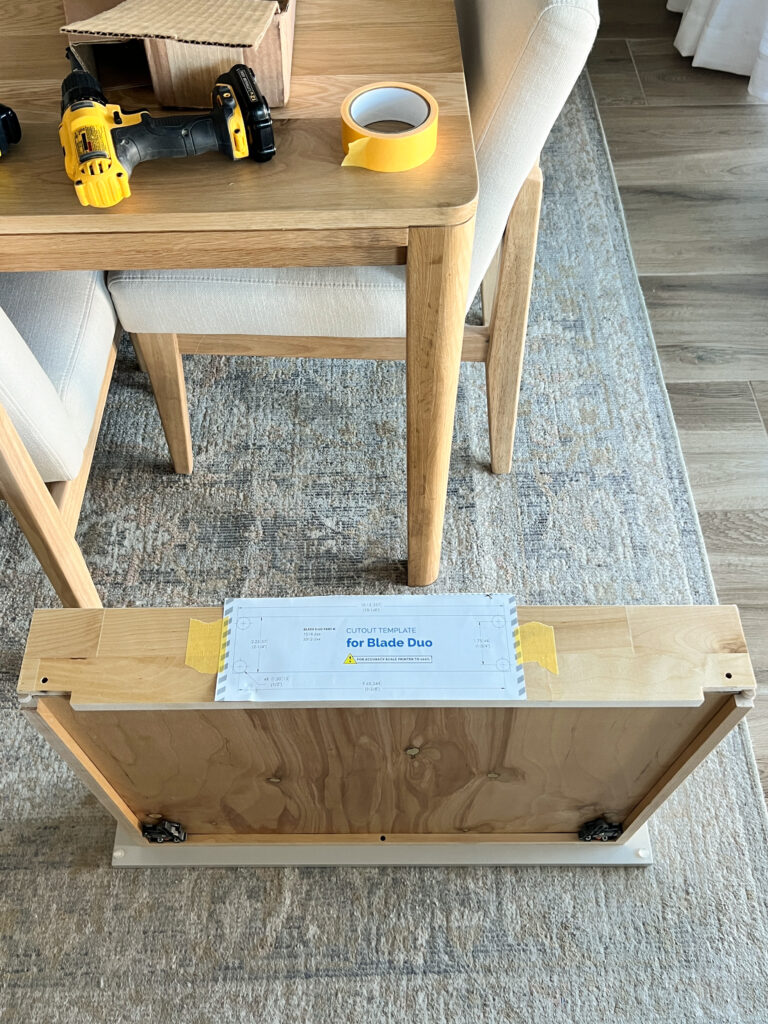
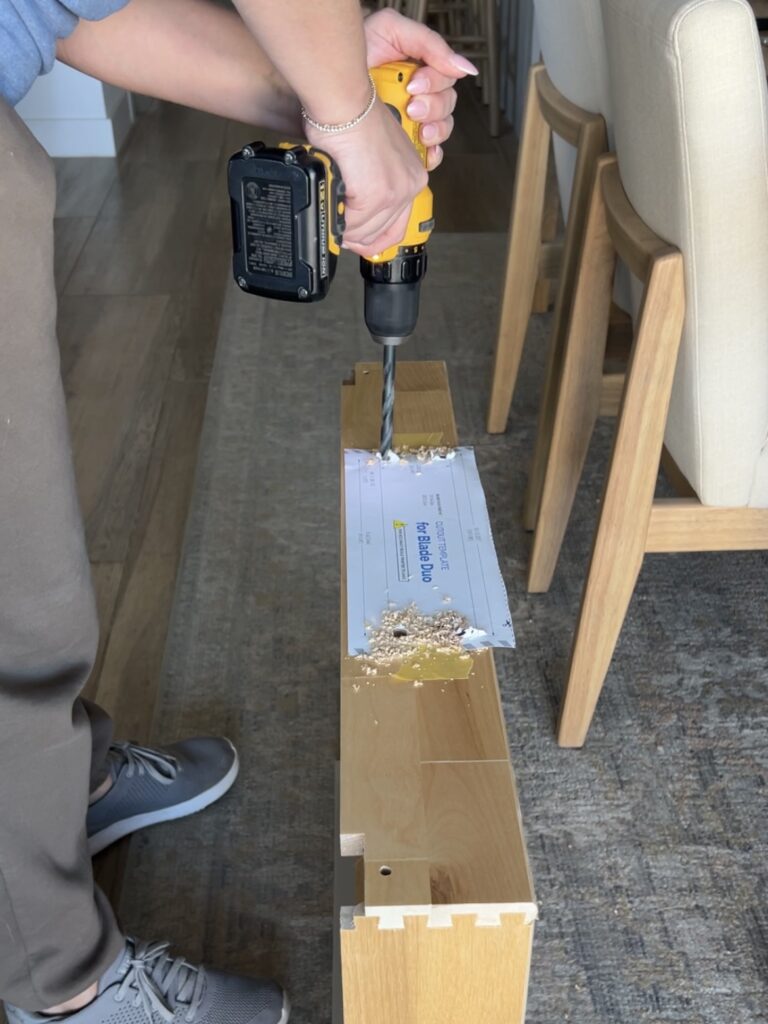
Place the template on the drawer and tape it into place. Then use a 1/2 inch drill bit to drill through the template and through the back of the drawer box where the template indicates.
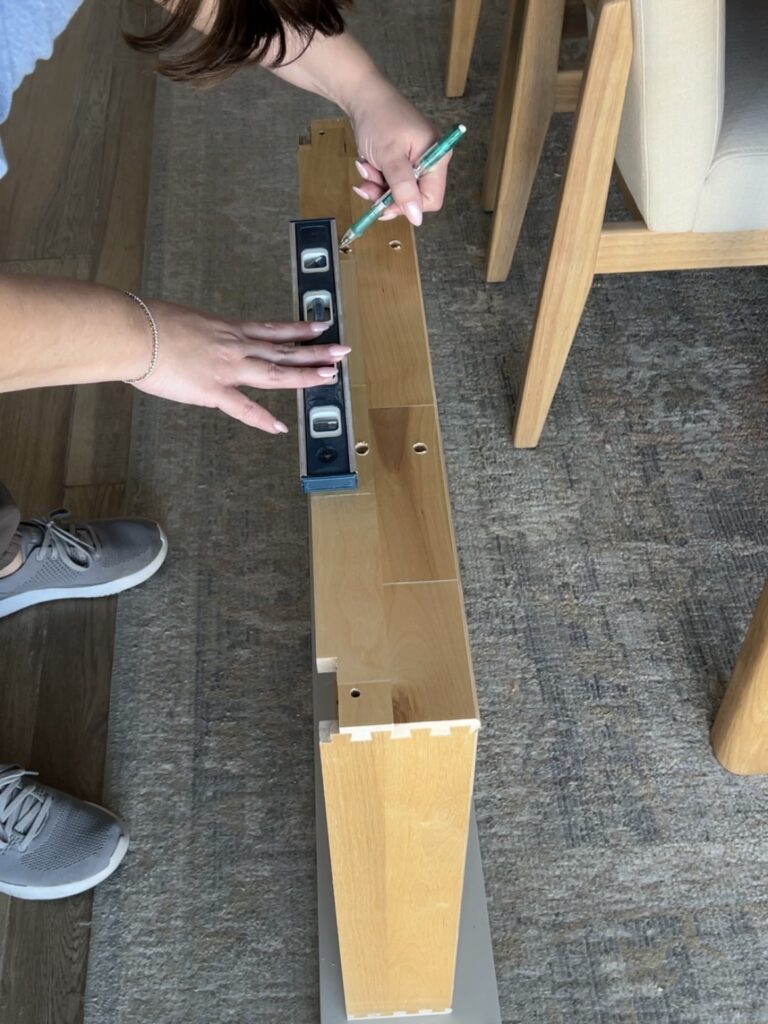
Remove the template. Using a straight edge, draw a box around the outside of the 4 holes you just drilled. Using your jigsaw, insert the blade into one of the holes. Follow the lines you drew to create the cut out needed. Before moving on, make sure the Docking Drawer outlet fits through the hole you just cut.
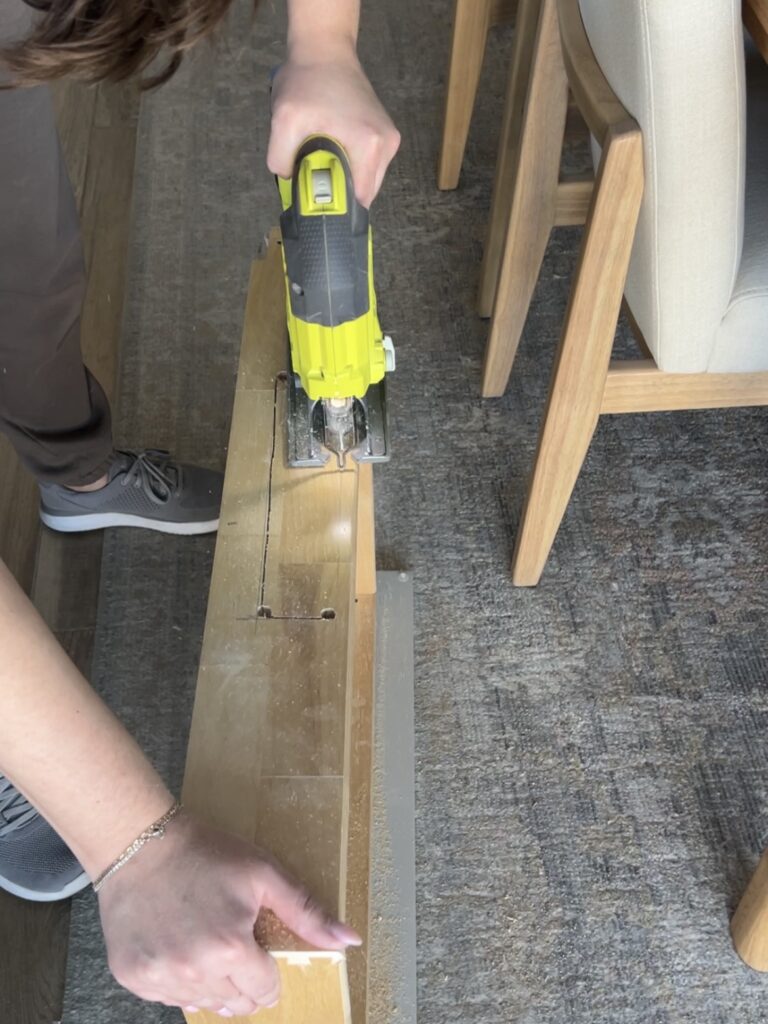
Step 2: Installing the Docking Drawer Outlet
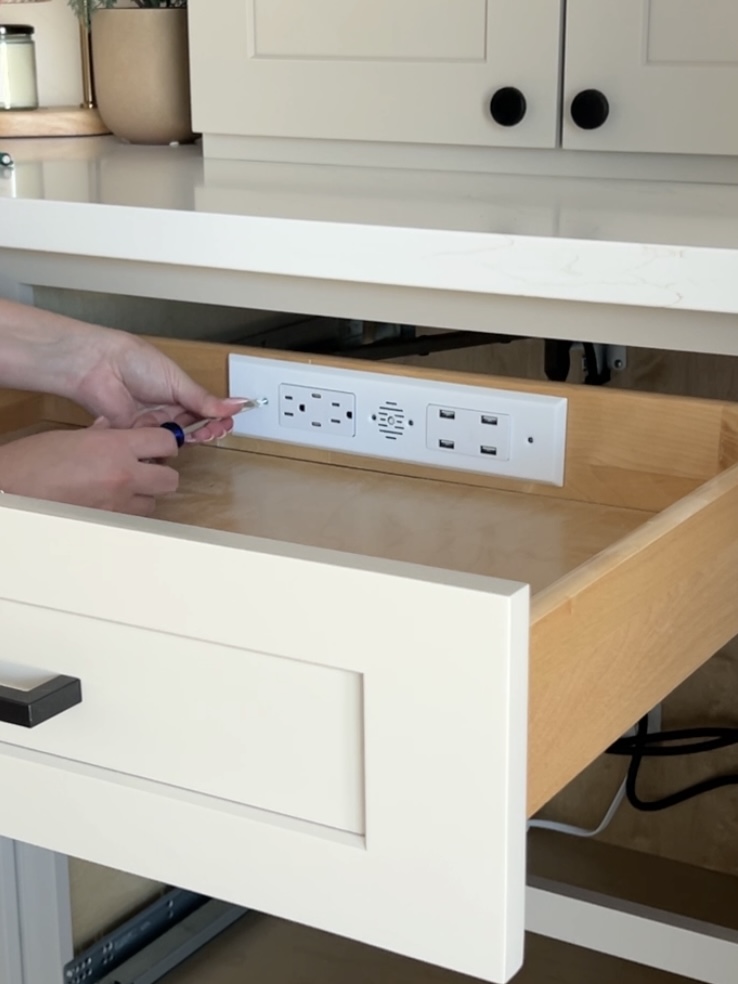
Reinstall the drawer and slide the Docking drawer outlet through the back of the drawer box through the hole you cut and secure it with the 4 box mounting screws that came with it.
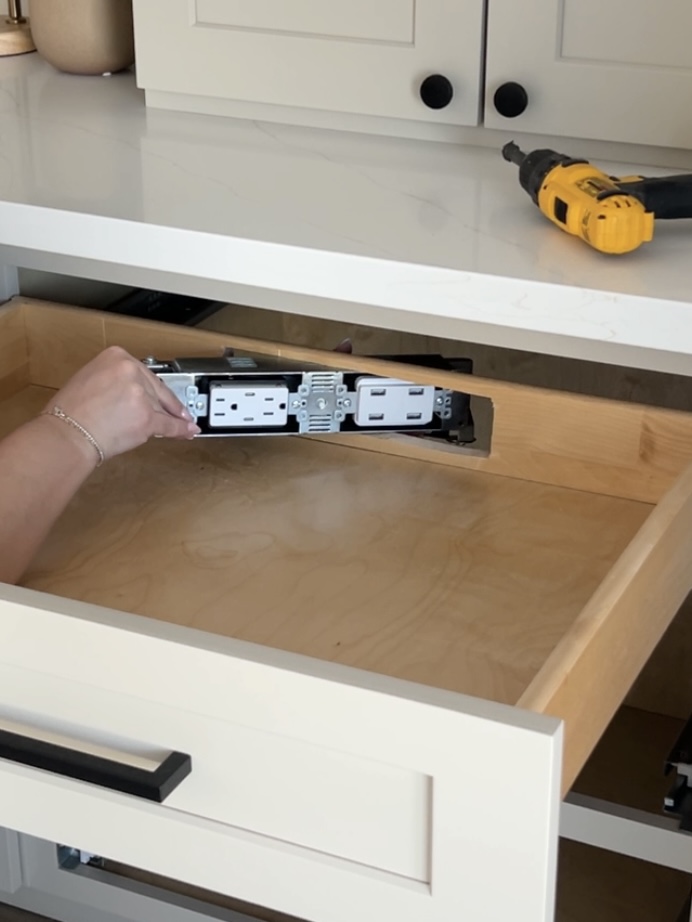
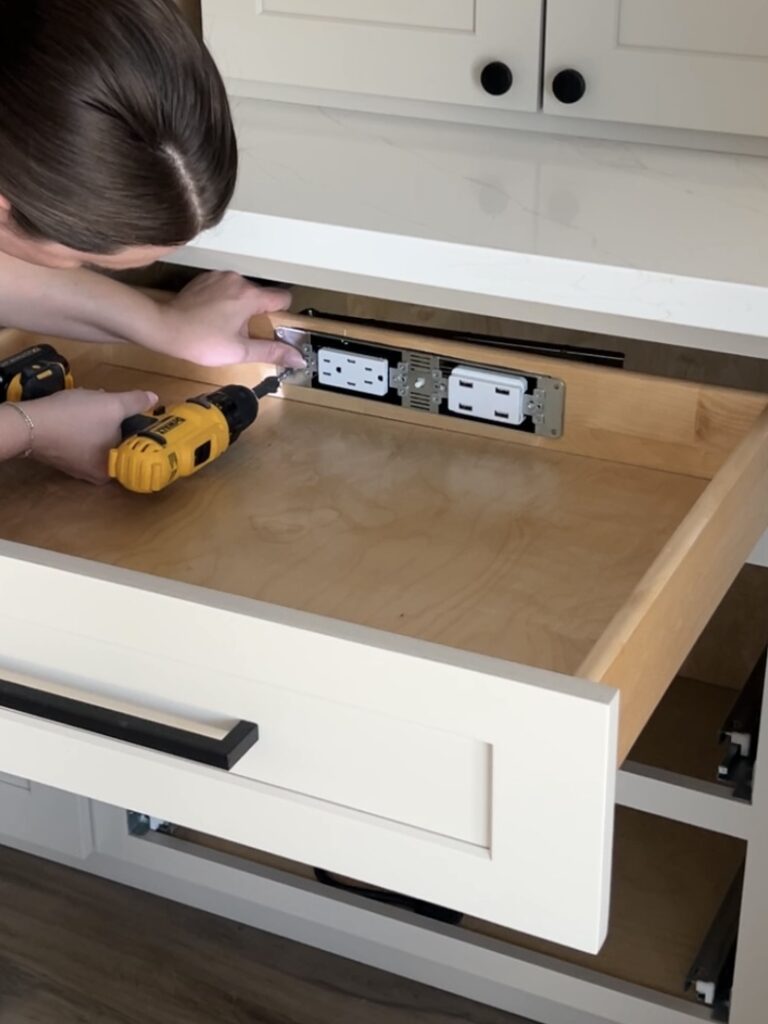
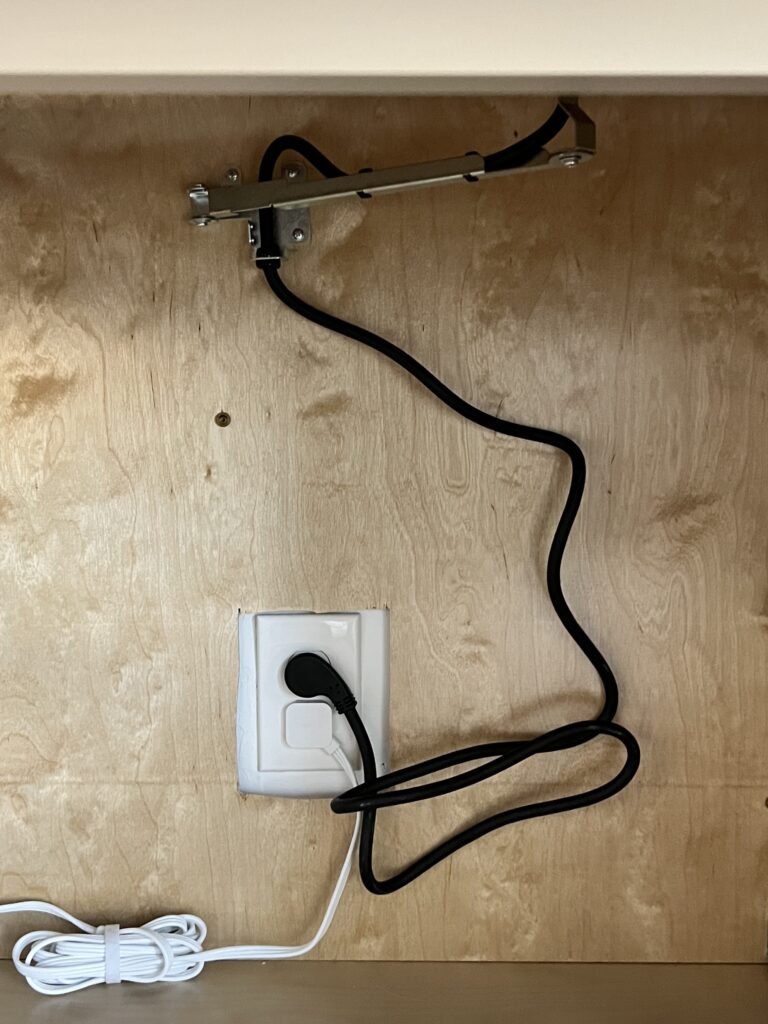
Now you need to screw the arm into the wall. To make this easier I removed the drawers below so that I could see up under the drawer. Close the drawer most of the way and then extend the arm to the wall. You want to make sure the arm is level and that everything is lined up correctly and moves freely. Once lined up where you want it, screw it into the wall using the 3 rear mounting bracket screws provided.
Next install the cover plate and finally plug in the power cord to the electrical outlet in the wall.
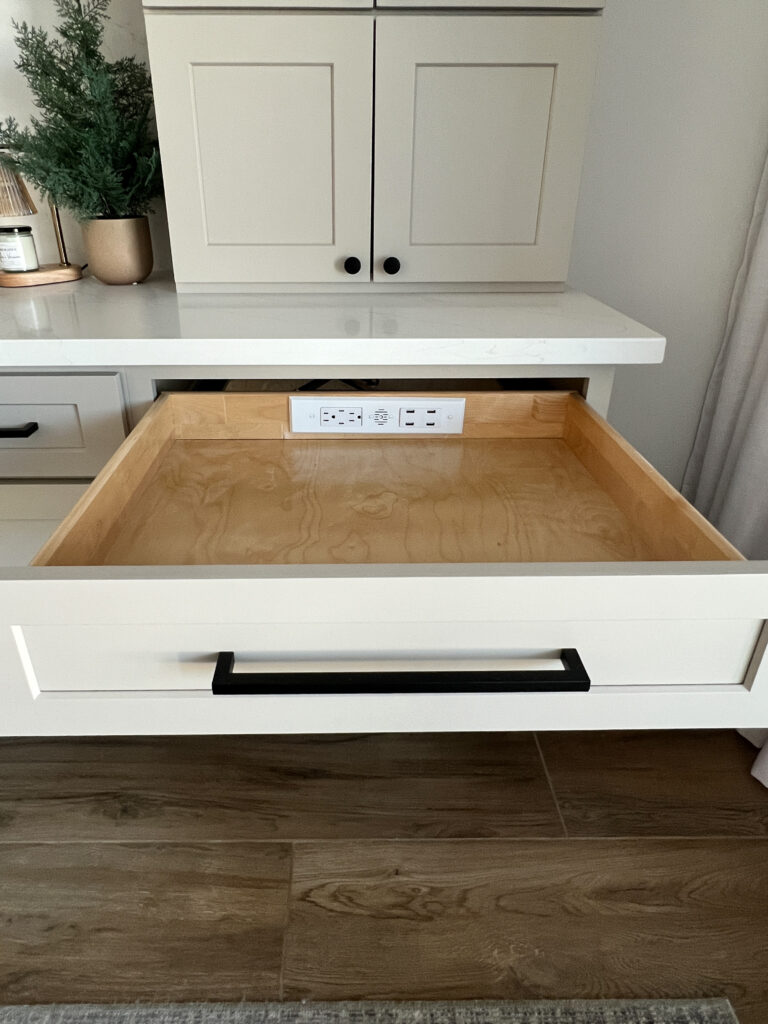
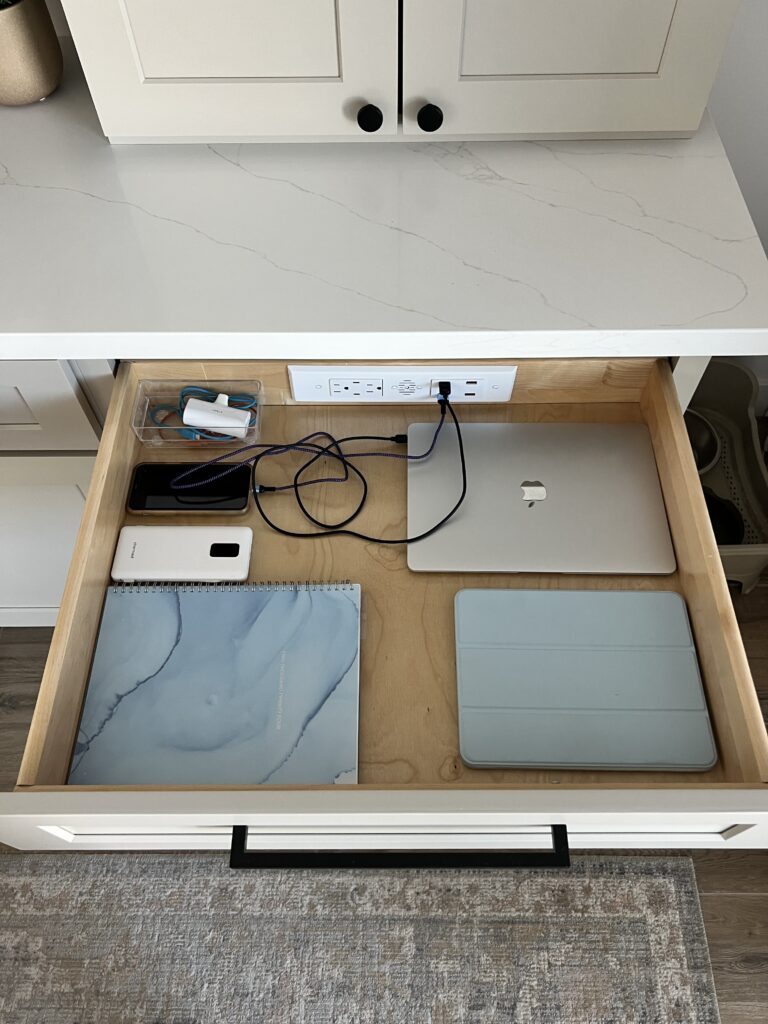
And that’s it! Now you have a functional and safe charging drawer. Take all your gadgets and cords and organize them in the drawer so that you never have to look at cord clutter again!
If you’re interested in seeing more of the area where I placed this charging drawer, you can check it out here.
Tag me on Instagram @handtreatedhome if you tackle this DIY project!
Questions? Email me at hello@handtreatedhome.com or feel free to leave any questions or comments below!


